Cant Stop Probability Calculator
Compare stop value against one more roll using active columns, live climber positions, completion distance, dice-pairing busts, and expected progress.
| Column | Track length | Banked | Live climber | Distance to finish | Turn spaces at risk |
|---|
| Pairing check | Pair layout | Outcomes with no hit | Outcomes with active hit | Best-use note |
|---|
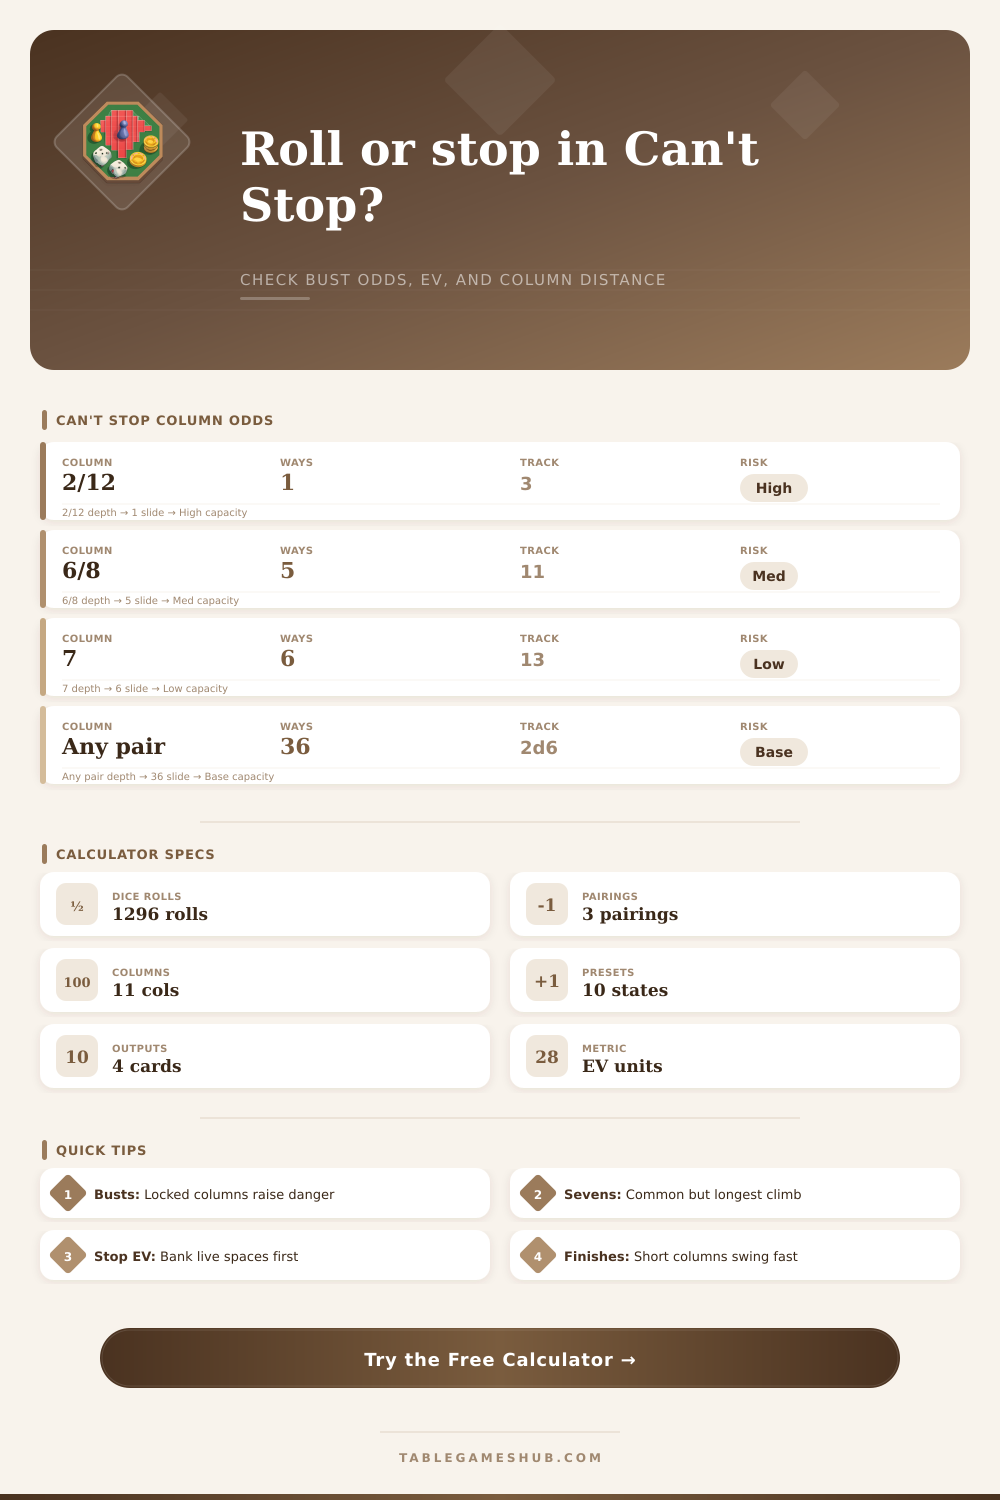
| Column | 2d6 ways | One pair chance | Track length | Distance pressure |
|---|---|---|---|---|
| 2 or 12 | 1 of 36 | 2.78% | 3 spaces | Short but rare |
| 3 or 11 | 2 of 36 | 5.56% | 5 spaces | High swing |
| 4 or 10 | 3 of 36 | 8.33% | 7 spaces | Moderate edge |
| 5 or 9 | 4 of 36 | 11.11% | 9 spaces | Balanced climb |
| 6 or 8 | 5 of 36 | 13.89% | 11 spaces | Reliable long lane |
| 7 | 6 of 36 | 16.67% | 13 spaces | Safest, longest |
| Progress from best pairing | Outcome count | Probability | Meaning |
|---|
| Tier | Bust range | EV signal | Typical decision |
|---|---|---|---|
| Green | Below 25% | Roll EV is positive | Roll is mathematically attractive |
| Amber | 25% to 40% | Small positive or small loss | Profile and game score matter |
| Red | Above 40% | Roll EV is negative | Stopping protects live progress |
| Claim swing | Any bust range | Finish bonus dominates | Roll only when completion odds justify it |
Deciding whether or not to roll the dice again in Can’t Stop requires you to determine the relationship between the potential gain that are possible from rolling again and the potential losses that could result. You have three climbers on the board and each of your three climbers are on the board at various distance from each of your banked positions and the finish line. If you roll the dice again it is possible that your climbers will be advance towards the finish line, but it is also possible that you will lose the progress of the three climbers that are not yet banked.
Thus, you must decide whether the gain that is possible from rolling the dice again is greater than the loss that you may suffer from taking the risk of rolling again. There are four dice in the game, which creates 1,296 different possible outcome from rolling the dice. Each of those potential outcomes can be paired in three different ways, and each of those ways can interact with each of your three active columns.
Should You Roll the Dice Again in Can’t Stop?
Thus, the model must test each of the 1,296 possible outcomes against each of your three active columns to determine the probability that at least one of your player will be advanced and the probability that all of your column pairing efforts will fail. The length of each of your columns will impact your decision to roll again. For instance, if any of your climbers are positioned on a seven, that requires thirteen space to reach the finish line.
In contrast, if any of your climbers are on a two or a twelve, those climbers only require three spaces to finish. Additionally, the calculator takes into account the frequency of each of these possible dice sums, since it calculates the likelihood that one of your climbers will be advanced towards the finish line and the likelihood that such an advancement will complete one of your columns. You also need to understand the difference between banked spaces and live spaces.
Any spaces that you have advanced with your climbers that cannot yet be banked will dissapear if you roll a number combination that does not allow for the movement of any of your climbers. Thus, you must determine the live spaces that you have and the amount of progress that you could potentially lose by rolling the dice again. Many players who are unfamiliar with the game may only consider the distance that each of their climbers still needs to travel to the end of the track.
However, there is a difference between the value of a column that is two spaces from the end of the track compared to a column that is eight spaces from the end of the track. The distance that each of your players needs to travel can impact your decision about whether you should roll the dice again. The state of the game will also impact the decision about whether to roll the dice again.
If you have already completed one or two columns with your opponents you may want to avoid rolling the dice again since you are near the three-column mark that is required to win. Thus, a more conservative player may choose to stop rolling the dice again if the current player is near the win mark. However, if a player is trailing behind the other players in the game, they may be willing to take the risks of losing there current spaces in order to catch up to the leaders of the game.
The combination of the three columns that are chosen also impact the bust rate. Columns six, seven, and eight are three of the best columns to select for your players. If, instead, you replace one or more of those columns with a two or a twelve you will expose yourself to more risk.
The calculator provides each of the possible counts for each of the three columns that you select so that you can determine how your bust rate will change as a result of changing the columns that you use for your players. It is also important to determine the difference between the chance that your players will advance and the expected progress of your players. Each of the players may have a sixty-five percent chance of advancing, but there may be a small gain to the game.
The percentage of rolls that will avoid busting and the expected gain of each player when rolling the dice are two different measures that will help you understand the implications of rolling the dice again. While the calculator that is provided will allow a player to determine the bust rate for their game, it cannot account for every factor that may impact their game. For instance, the calculator cannot account for how many spaces the other players may have advanced in their columns and how many turns remain in the game for each player.
Additionally, each player has different risk tolerance and preferences for the outcome of there game. Ultimately, the best way to approach the decision of whether to roll the dice again is to treat each live space as the cost of rolling the dice again. Thus, if the expected value is negative or if the bust rate is above forty percent you should stop rolling.
However, if you have an expected value that is positive and if any of your columns are positioned in the central spaces of the tracks you should continue to roll the dice. Thus, while the numbers will not make the decision for you, the numbers will remove the guesswork from the calculation of your decision.