Castles of Mad King Ludwig Room Calculator
Estimate room placement points, door completion readiness, completion rewards, downstairs timing, and depleted stack logistics before you set the tile.
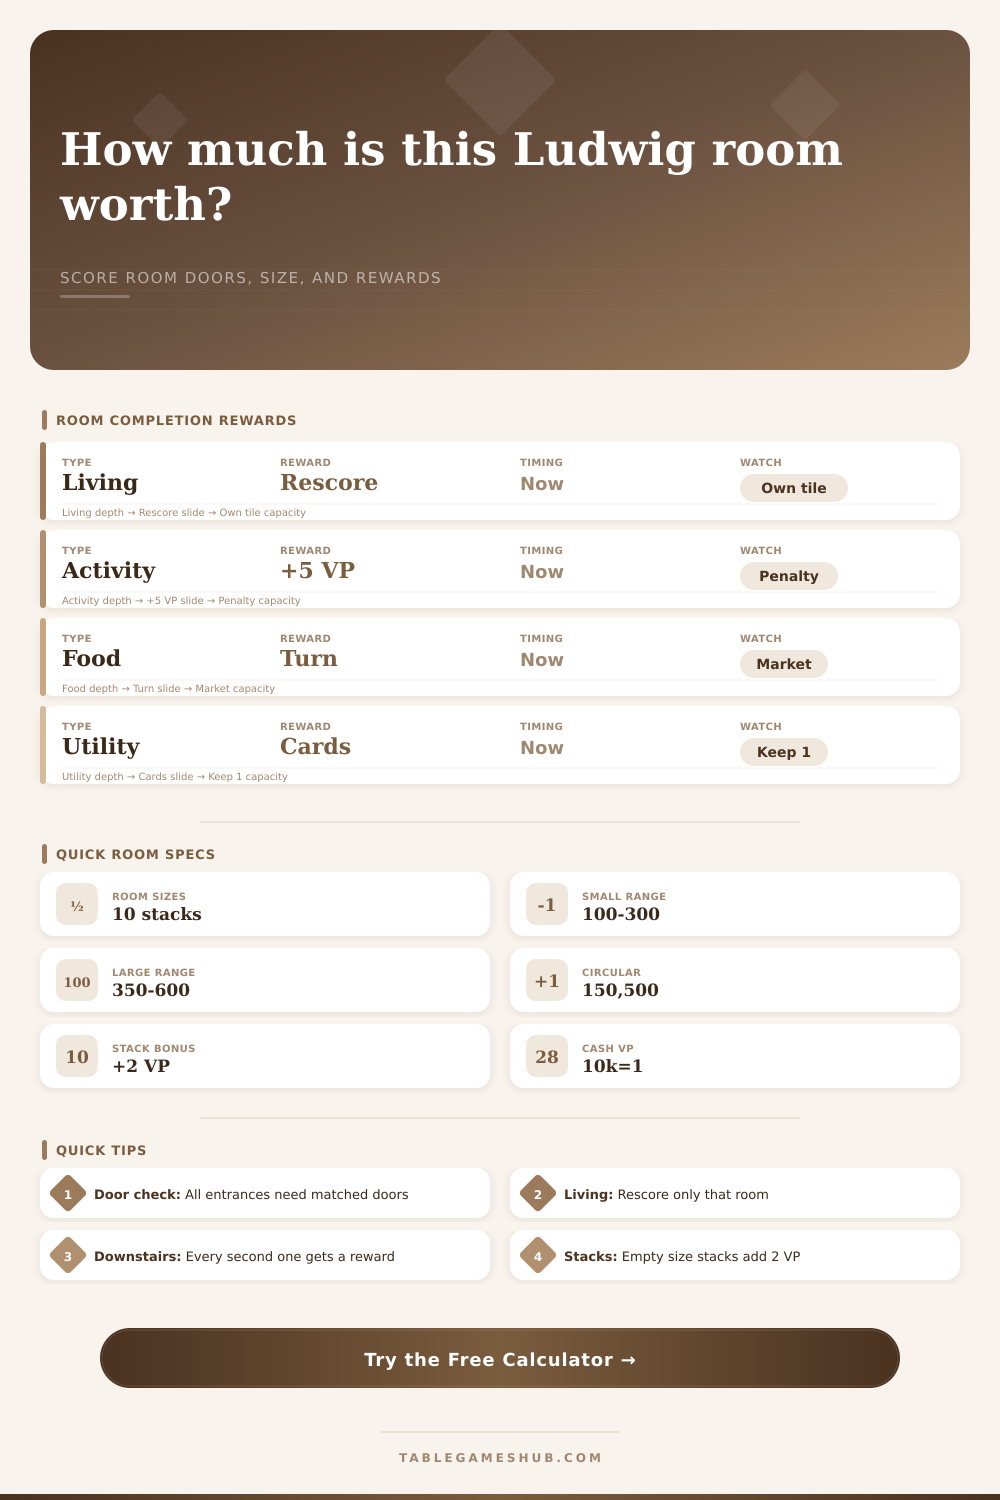
| Room Type | Completion Reward | Calculator Estimate | Logistics Note |
|---|---|---|---|
| Living Room | Re-score this room | Printed VP plus this room connection icons | Do not re-score neighboring rooms for the living reward. |
| Activity Room | Gain 5 VP | Flat +5 VP | Activity penalties may still reduce the placement score. |
| Food Room | Take another turn | Tempo value based on room size | Most valuable when market and money allow a real follow-up buy. |
| Utility Room | Draw 2 bonus cards, keep 1 | Planning value of 4 VP | Useful when your castle already points at clear bonus categories. |
| Outdoor Room | Gain 10000 money | 1 final VP equivalent | The money can matter sooner as buying power, but final cash is 10k per VP. |
| Sleeping Room | Choose 0, 1, or 2 room tiles for the deck | Planning value of 3 VP | Strong when a needed size or type is still in its stack. |
| Corridor Room | Place a free hallway or stairs | Connection value of 2 VP | Reward is limited to once per turn except special chaining cases. |
| Downstairs Room | Every second completed downstairs room gets a reward | 0 or selected reward estimate | Pairs matter; the first downstairs completion often sets up the second. |
| Size Stack | Class | Shape Note | Scoring Logistics |
|---|---|---|---|
| 100 sq ft | Small | Compact | Often easiest to finish quickly and useful for small-room favors. |
| 150 sq ft | Small | Circular | Circular count can matter for King's Favor and bonus cards. |
| 200 sq ft | Small | Flexible | Good for closing door chains without expanding the footprint too far. |
| 250 sq ft | Small | Mid small | Common bridge between easy completion and stronger printed VP. |
| 300 sq ft | Small | Largest small | Can satisfy small-room goals while scoring closer to large tiles. |
| 350 sq ft | Large | First large | Useful when large-room favors appear but space is still tight. |
| 400 sq ft | Large | Large | Often needs a prepared doorway path to complete cleanly. |
| 450 sq ft | Large | Wide large | Watch exterior doors so one blocked edge does not spoil completion. |
| 500 sq ft | Large | Circular | Combines large-room scoring with circular-size objective potential. |
| 600 sq ft | Large | Largest base | Big scoring ceiling, but door completion usually takes planning. |
| Placement Situation | Counts For Completion? | Scores Connection Icons? | Calculator Handling |
|---|---|---|---|
| Door connected to another door | Yes | Yes, if icon matches | Add one connected entrance and any earned VP. |
| Door touching a wall edge | No | No | Leave that entrance unconnected; blocked doors prevent completion. |
| Room touching without a doorway | No | Usually no | Only activity penalties use simple adjacency without a door. |
| Outdoor fenced edge touching room | Illegal placement | No | Do not use the calculator until the placement is legal. |
| Downstairs room to ground floor room | No | No | Use stairs or downstairs hallways for basement connections. |
| Multiple doors to same room | Yes for doors | Room type counted once | Score connected room type once unless the tile effect says otherwise. |
| Pattern | Best Input Focus | Good Result Signal | Risk To Check |
|---|---|---|---|
| Fast completion reward | Few open entrances, high connected count | Door Status says Complete | Do not leave one impossible exterior door. |
| Living room multiplier | High connection bonus on this room | Reward Value is near placement score | Neighbor room scores are not doubled by the living reward. |
| Downstairs pair timing | Completed downstairs count before placement | Second basement room unlocks chosen reward | Stairs must connect correctly before downstairs expansion. |
| Depleted stack scoring | Stack status and size class | End Stack Edge shows +2 VP | Only the supply stack matters, not market leftovers. |
| Activity placement | Penalty field and neighbor VP field | Net placement score stays positive | Activity penalties can trigger through adjacency. |
| Sleeping room setup | Completion status and stack size need | Reward points to next desired room | Late-game deck stacking may not create another full round. |
Castles of Mad King Ludwig gets most people to the stage where they have a pretty board, but they don’t know what they are doing math-wise anymore. They put down big room, then remember they covered up the door which earns them points for it. To win the game, you must understand the difference between high-value tile and a move that earns you points using that tile. You need to know when your move is good right now versus when your room will be finished. The long term value of completing a room is different then its initial value. If you can’t get those doors shut and claim the bonus, then all the printed value in the world doesn’t matter.
After specifying the room type and connections, the calculator (above) does the math for you. Does that pricey tile pay off? Do you get enough VPs to justify it? Input how many entrances are currenty blocked versus connected. Enter the room dimensions and victory points on the printout. People often neglect to include blocked walls. That’s what trips them up in the late game. All room entrance must connect with matching doorways to trigger completion. Otherwise, the room stay open and only nets its base value.
How to Win at Castles of Mad King Ludwig
This also applies to knowledge about layout of rooms. An activity room is worth flat points. With a penalty for neighboring squares; while a living room score itself up based on surrounding icons (unpredictable, but powerful). Knowing this helps you value your inputs. Food room adds another turn. That’s tempo value, depending off market cards. The calculator estimates this pay out and lets you weigh it next to a sure thing or a gamble. It doesn’t dictate decisions, but it’ll show you the price of waiting.
There’s also a layer of stack management which is simple but easily overlooked. There are only so many tiles in each room size. Emptying out that stack earn an extra two victory points per room of that size in your castle. That bonus is often greater than whatever immediate value the tile you just played give. Should you use the last few small rooms or hold them for a larger benefit? It’s a decision made with probability in mind. The tool allows you to enter state of the stacks and view how much end-game edge it provides. If the stack is nearly empty, the immediate placement score might be lower, but the final tally could surge. The immediate score may be lower. The final tally could surge. So.
Rooms downstairs are a different beat. Each time you place a room in the basement, you only recieve a reward for every second completed room. The initial basement room you place is typically a setup move. It doesn’t pay off directly, rather it set you up for the next placement. If you don’t recognize this pattern, you miss out on opportunities. You waste turns racing to fill a basement room. You neglect that the game rewards you on the even numbers. The calculator tracks this count and lets you know whether you’re triggering a reward with your next move or simply building toward one.
The last trap is door logic. Sure, you’ve got these kickass icons for rooms. But if there’s one door that faces the edge of the board, then it’s dead weight. Exterior doors gets overlooked by players until it’s too late to fix. Players stack other tiles into the space, trapping themselves from finishing the room. This is easy to avoid if you check the number of doors before laying down the tile. It gets you thinking about shape of the castle instead of only the shape of each room. The tool will highlight which entrances are open and allow you to plan your next move.
A castle isn’t built to fill empty space; it’s built to be efficient. To manage resources. It is built to time your rewards. It is built to maintain access from place to place. It’s about building the numbers, but it’s all in the connections. You need to weigh immediate reward against potential for the future. You want to know which rooms to build next. You need to know what to do when you’re trying to dodge penalties and what to do if you’re going for an exact room count bonus. That’s where the calculator comes in: taking complex interactions and turning them into easy-to-understand scores. It turns your intuition into data.
That’s because good players plan several moves ahead. When they place a small room today, they realize it may finish a chain tomorrow. If they block a door today, they realize they’ve lost a point forever. Those consequences are visible thanks to the tool. But you’re still left to make the call. You don’t need to guess at the math anymore. Precision and patience is rewarded by the structure of the game. The hidden bonuses and the hidden costs become apparent, and the castle begins to build itself. It just takes following the logic.