Splendor Duel Royal Calculator
Plan a crown purchase, value the best available royal card, and compare the 20 prestige, 10 crown, and 10 same-color victory routes before you spend tokens.
| Crown total after purchase | Royal card result | Priority check | Calculator handling |
|---|---|---|---|
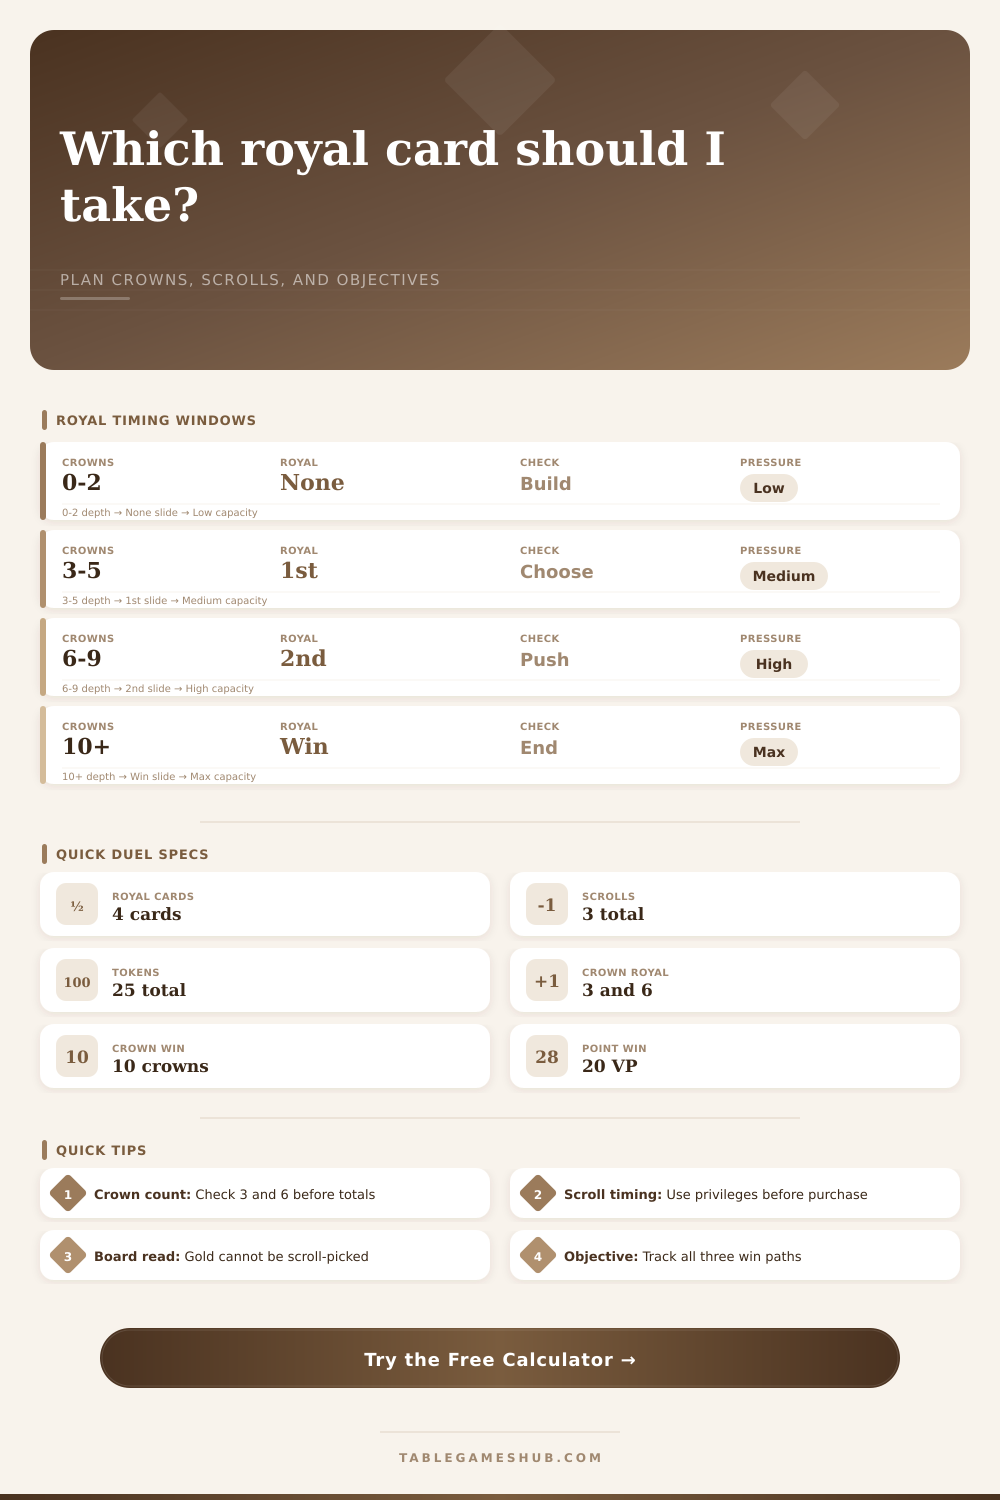
| 0 to 2 crowns | No royal card yet | Build toward the 3rd crown | Royal swing stays at 0 unless a threshold is crossed. |
| 3 to 5 crowns | First royal card becomes available | Choose the strongest remaining royal card | Adds the selected royal prestige and ability weight. |
| 6 to 9 crowns | Second royal card becomes available | Check whether 10 crowns is now realistic | Marks the crown route as a serious victory lane. |
| 10 or more crowns | Crown victory condition is met | End-of-turn win check | Ranks crowns above non-winning setup value. |
| Objective path | Target total | Royal card impact | When to prefer it |
|---|---|---|---|
| Total prestige | 20 or more prestige | Royal points can finish this immediately | Best when the royal card pushes your post-purchase total to 20. |
| Crowns | 10 or more crowns | Royal card does not add crowns, but crowns trigger it | Best when your target Jewel card reaches 9 or 10 crowns. |
| Single color prestige | 10 or more prestige in one color | Royal points count to total prestige, not a card color | Best when the target card joins your strongest color group. |
| Royal tempo chain | No fixed target | Ability can create a token, scroll, or extra turn | Best when the board still has the exact token you need. |
| Board state | Privilege value | Gold warning | Actionable read |
|---|---|---|---|
| Needed Gem or Pearl visible | High | Gold is excluded | Spend scrolls before the purchase if they complete the cost. |
| Adjacent line already works | Medium | Gold still requires reserve | Taking tokens may avoid giving the opponent a scroll. |
| Board is thin | Low to medium | Replenish may expose Gold | Replenish only if the royal threshold cannot wait. |
| Opponent holds all scrolls | Swingy | Penalty can be muted | Three same-color tokens or two Pearls may be less costly. |
| Available royal card | Prestige swing | Ability value | Best calculator use case |
|---|---|---|---|
| Prestige plus Privilege | Usually 2 points | Scroll converts visible Gem or Pearl access | Strong when the board has a missing token for the next card. |
| Prestige plus board token | Usually 2 points | Immediate token if matching token remains on board | Strong when the target color is still visible after purchase. |
| Prestige plus opponent token | Usually 2 points | Denies a Gem or Pearl from the rival supply | Strong when the opponent is holding your next missing token. |
| Prestige plus extra turn | Often 3 points | Can chain into the same-color or crown objective | Strong when you already have the next purchase nearly funded. |
Three Crowns in Splendor Duel transforms it from a tranquil puzzle to a nail-biting game of time management. Suddenly, you don’t buy cards for building an engine; you buy triggers that may helps you win or give your opponent an edge. Because royal cards aren’t passive bonuses but rather immediate state-altering key events, the tension grow. How do you decide if you should trigger a royal card now or later? It’s hard to calculate.
You have to juggle several victory condition in your head as you scan the board. Players overemphasize prestige points alone. They think “Two prestige, plus a privilege scroll? That’s an easy score.” Wrong. A privilege scroll is only worth what’s available on gem board, in terms of tokens. If you don’t have the token you want for your next level three card, then what good is the scroll?
How to Win Splendor Duel
By knowing exactly which scrolls and tokens you have, the calculator will do math for you. It will help prevent you from under-estimating the tempo. Do you take the royal card because it’ll help get you your next item, or does it just add points and leave you resourceless?
The thresholds are also fixed so timing matter. If you get three crowns then you unlock first royal card. Six is second. Ten is game over. There is no in-between. That means there are specific times when your decisions will differ from each other. In the early part of the game, you may hold off purchasing a card which grants you a crown to prevent your opponent from triggering a royal. Toward end of the game, you may be willing to force yourself into purchasing a card even though this grants your opponent a royal card because at this point the only way for you to win is by getting ten crowns. As you can see in the reference table below, the longer you go without a crown and the more you have accumulated, the more urgent it becomes to do something about it.
Weigh short term cost of giving up a good royal card with the long term benefit of ending the game. The way winning works also muddies things up. There’s a path to victory by reaching 20 prestige, another by reaching 10 crowns, and another by reaching 10 in one color. Getting royal cards contributes to your prestige score, but doesn’t contribute to either your crown score or your single color score. So, for example, a royal card could bump you up into the twenty point category; but it won’t help you towards other categories. You need to keep track of all three at once.
If you’re ahead by five points in red gems and there’s a card that bumps you up by two more, then you’re getting close to color win, even though based off prestige alone, you don’t appear as far along. Failing to account for this will result in missteps in which you buy a royal card expecting it’ll complete you … only to discover that your color total was actualy the quicker way to get across the line. You should of seen it coming.
There’s also depth in resource management. You can take pearls or gems off the board with privilege scrolls; however, you can’t take gold that way. That’s a common oversight. Want gold? Need gold? Can you use a scroll to get some? Sorry, you won’t get any gold. Run out of gold? Find another means of payment, or save up. And this is where board state comes into play. If most of the scrolls are held by your opponent, then cost of missing a token becomes less severe since he can’t really punish you as well. On the other hand, if there’s a lot of board space available and you restock it, you may well provide your opponent with much-needed scroll. These decisions aren’t obvious yet they make all the difference.
Control the pace: know the worth of all the cards in your hand in relation to your board. Stall where it matters and speed up where it doesn’t. Points aren’t everything; this is a race with more than one finish line. The math becomes clear through use of these tools, but the strategy lies in knowing which of those finish lines is truly meaningful and which is a red herring. Know where you want to go and plan accordingly, let the numbers be the confirmation of what you think might be true.