🃏 Risk Card Trade-In Calculator
Calculate Risk reinforcement armies from card set type, trade number, wildcard use, escalating schedule, fixed variants, territory matches, and hand pressure.
| Step | Value | Formula | Risk Read |
|---|
| Rule Variant | Trade Sequence | Set Treatment | Best Use |
|---|---|---|---|
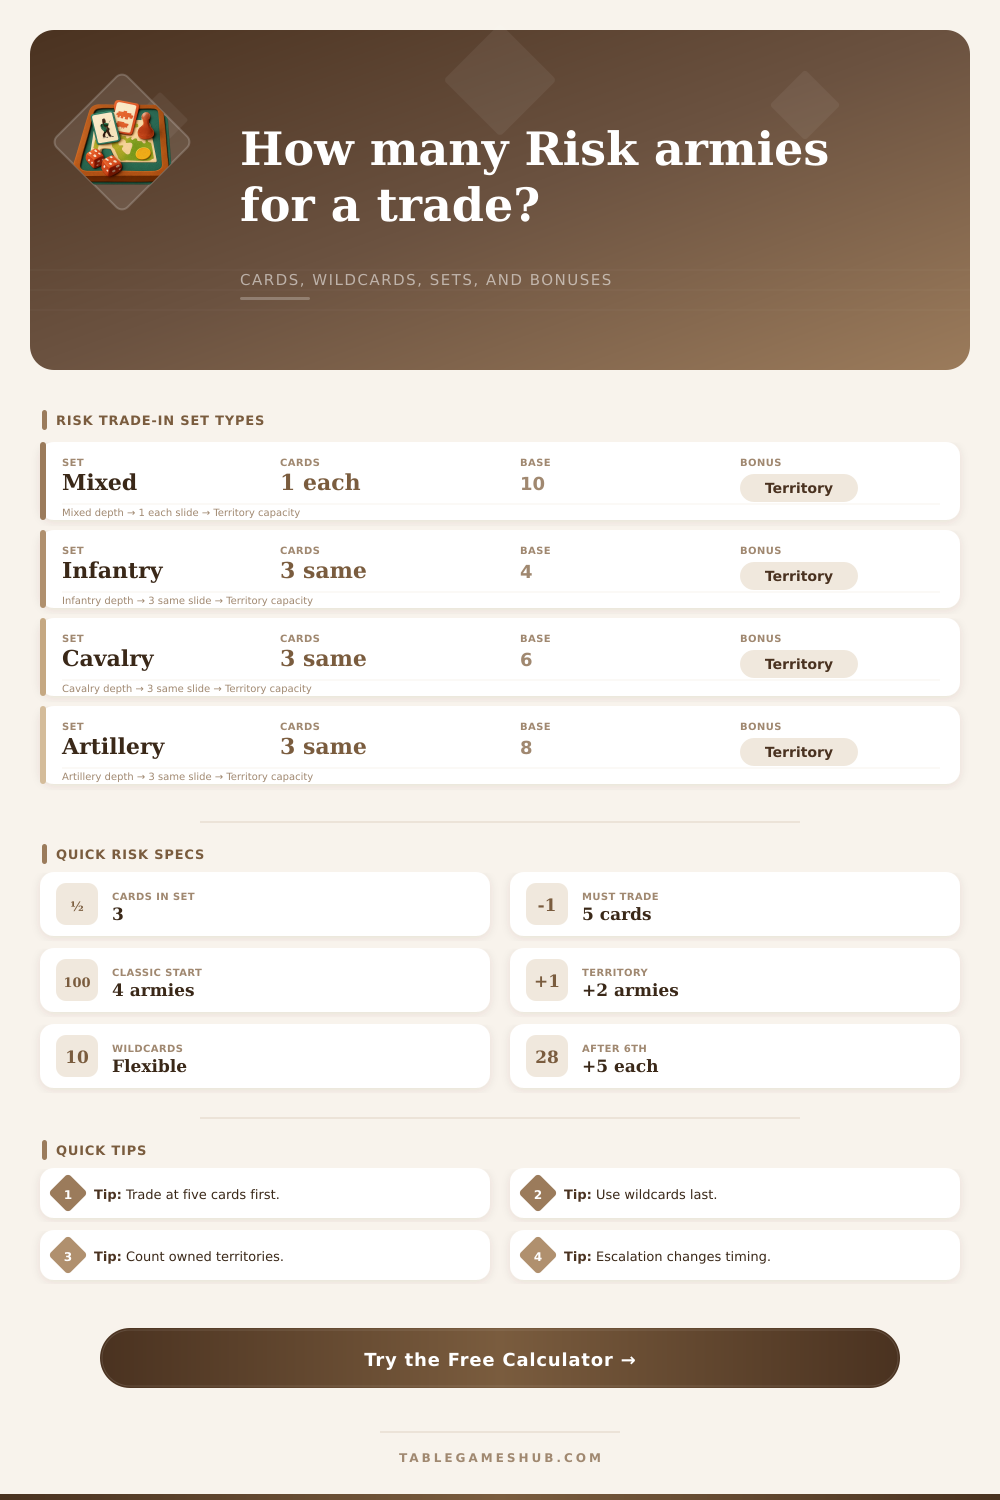
| Classic escalating | 4, 6, 8, 10, 12, 15, then +5 | Any legal set uses the next sequence value | Standard global Risk games with rising reinforcement swings. |
| Fixed symbol values | Infantry 4, cavalry 6, artillery 8, mixed 10 | Set type determines base armies | Good for older or house variants that keep values stable. |
| Tournament fast | 6, 8, 10, 12, 15, then +5 | Any legal set uses faster escalation | Shorter games where trades should matter sooner. |
| Progressive cap | 4 through 30, then capped | Any legal set uses capped progressive value | Prevents very late trades from dominating every board state. |
| Custom schedule | User-entered base value | Any legal set uses custom base armies | Useful for scenario boards and local tournament sheets. |
| Legal Set | Card Pattern | Wildcard Role | Calculator Priority |
|---|---|---|---|
| Mixed set | 1 infantry, 1 cavalry, 1 artillery | Fills whichever symbol is missing | Highest fixed value and strong wildcard efficiency. |
| Infantry triple | 3 infantry cards | Can complete a missing infantry count | Usually lowest fixed value but still legal. |
| Cavalry triple | 3 cavalry cards | Can complete a missing cavalry count | Middle fixed value in symbol-based variants. |
| Artillery triple | 3 artillery cards | Can complete a missing artillery count | High fixed triple value in symbol-based variants. |
| Wildcard pair support | Any two natural cards plus wildcard | Completes mixed or same-symbol set | Calculator tests all options and chooses best output. |
| Trade Number | Classic Value | Fast Value | Cap Variant |
|---|---|---|---|
| 1 | 4 armies | 6 armies | 4 armies |
| 2 | 6 armies | 8 armies | 6 armies |
| 3 | 8 armies | 10 armies | 8 armies |
| 4 | 10 armies | 12 armies | 10 armies |
| 5 | 12 armies | 15 armies | 12 armies |
| 6 | 15 armies | 20 armies | 15 armies |
| 7+ | Add 5 each trade | Add 5 each trade | Max 30 armies |
| Hand State | Cards Held | Trade Rule | Practical Read |
|---|---|---|---|
| No complete set | 0 to 4 cards | No trade available | Hold cards unless a wildcard or capture creates a set. |
| Optional set | 3 or 4 cards | Trade is usually optional | Compare reinforcement value against board timing. |
| Forced trade | 5 or more cards | Must trade before continuing | Calculator marks forced pressure and uses the best legal set. |
| Post-trade near cap | 3 or 4 cards after trade | Future forced trade is close | Expect another trade after captures if card gain continues. |
Separate base armies from territory bonus
The trade sequence controls the base reinforcement total, while territory matches add placement armies. Track them separately so the card set value and board placement bonus stay clear.
Check forced trade pressure at five cards
If a player starts with five or more cards, most Risk rule sets require a trade before attacking. Use the cards-after field to see whether another forced trade is close.
Risk card trading is central to the game because risk card trading allow the game to move from a slow phase to phase where players grab as many territories as they can. When you have three cards in your possession that form a legal set, you must decide whether to trade those cards or keep them in your possession. You may trade your cards early to gain some immediate armies for your territories, but you may also do so in order to allow the next player to obtain more valuabel trade.
If you do not trade early, though, you may end up in the five-card forced trade rule that removes your options for the trade. The calculator will help you to calculate the math for this decision since the calculator can assess your current hand, the sequence of the trade, and whether your cards represent any territory that you already hold. By using the calculator, you can remove the mental math from your mind as you make this decision.
When to Trade Risk Cards
The value of the trade will depend upon the variant of rule that the players are using. For instance, classic escalating schedules start with relatively low trade values but escalate quick after the sixth trade. The fixed value variants do not use trade counts but instead award armies for having three of each of the different type of units.
Tournament fast schedules, finally, feature high trade values early in the game rather than later, encouraging players to trade their cards early. Each of these rule variants will impact the decisions of the other players, but the calculator make clear the difference between each of them. Additionally, wildcards introduce one more layer of complexity to risk card trading.
With wildcards, you are able to complete a mixed set, as well as complete a triple set if you are missing only one of the symbols for that set. The downside to using wildcards, however, is that it reduce the number of options that you have with your remaining cards. For instance, if you use two wildcards to complete a trade, you will have fewer cards that can be used to form a set should you acquire one of these cards during the remaining portion of your turn.
Territory matches are another aspect of risk card card trading. Territory matches occur outside of the trade schedule and provide you with additional armies if any of the cards that you trade depicts a territory that you control. These additional armies are not used for the trade that follows your trading of these cards.
Because of this, players are encouraged to trade sets that will allow them to gain more territories that they control. The calculator can separate the trade value from the territory bonus so that players is aware of the two different values of these trade actions. When a player has more than four cards in their hand, the hand pressure rule comes into play.
At five cards, most rules require a trade to continue their turn. By using the cards after field on the calculator, a player can determine what their hand will be after trading three of their cards. This information help to players to determine whether they will attack at a neutral territory or one that they already control.
There are a variety of different house rules that the players may use. For instance, some groups will cap the escalating trade schedule at thirty armies, but other groups will use the classic climb that provides a significant advantage to the group that trades at the end of the game. The calculator allows players to switch between these schedules quickly and to assess the impact that each schedule will have upon their hand.
Finally, there are some mistake that players make that are common among many players. For instance, many players will trade the first set that they encounter in their hand rather than checking whether another set with a higher value exists. Additionally, players often forget about the bonus armies that can be earned from territory matches.
The tool can identify the best set that you can make based off the rules that you and your opponents have chose, but you must make a decision regarding whether the timing is right to trade that set. An understanding of the game can be obtained by reading the game state and the number of cards that each of the players holds. For instance, if each of your three opponents have four cards in their hand, trading a fifth card will provide a player with an advantage.
Additionally, if the board is divided into two large portions of the map, you may want to hold onto your cards until the opponent makes a breakthrough into one of these sections. While the calculator will not replace your ability to read the game, it may help you to avoid mental math that may cloud your judgement of the game state. Finally, the decision about when to trade will always involve a decision between two variables: the value of trading your cards for immediate reinforcement of your controlled territories versus the value of holding onto your cards for future potential.
The numbers that this calculator provides to you will provide you with a clear view of these two values, but the decision of when to trade your cards is still your decision.