Red Rising Score Calculator
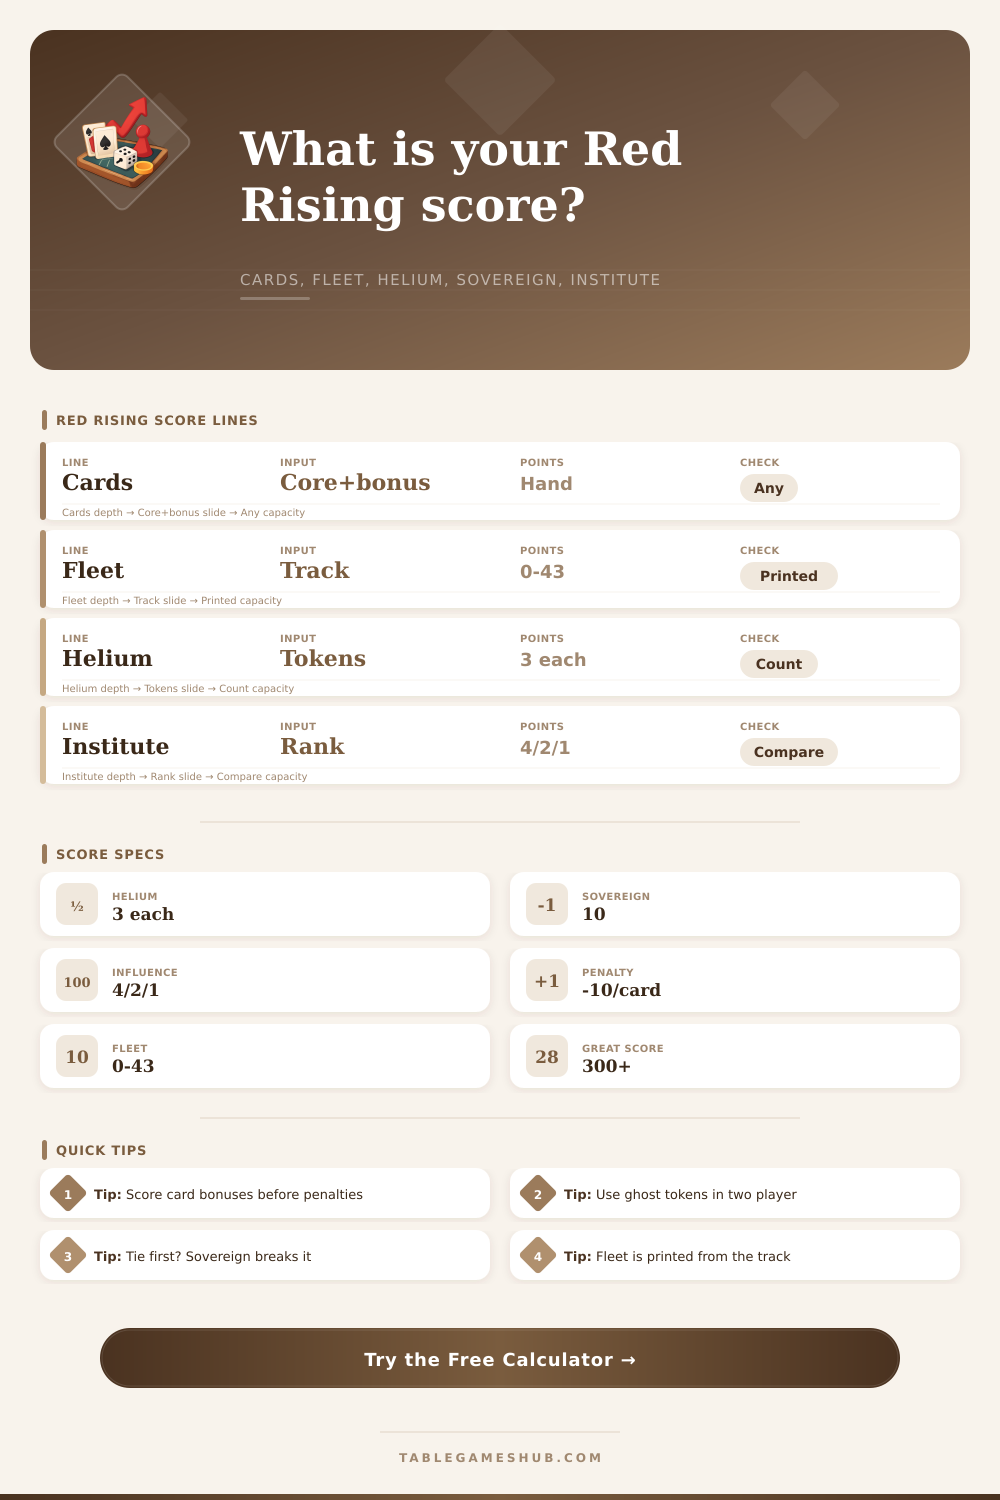
Total a Red Rising end-game score from character cards, card bonuses, Fleet track value, Helium, Sovereign token, Institute influence ranking, excess-card penalties, and table adjustments.
Load a plausible final table state, then replace the numbers with your actual scorepad values.
Enter every visible Institute count. The calculator ranks tied leaders together, then tied second-place groups together.
| House | Influence | Rank group | Multiplier | VP |
|---|
| Step | Score line | Input to use | Calculator treatment |
|---|---|---|---|
| 1 | End-game card abilities | Resolve all card text first | Add net result to card bonus field |
| 2 | Character card core values | Upper-left VP on cards in hand | Add into card subtotal |
| 3 | Fleet Track | Printed VP at ship position | Entered directly, capped in guidance at 0-43 |
| 4 | Helium and Sovereign | Token count and token holder | 3 VP each Helium, 10 VP for Sovereign |
| 5 | Institute influence | All players' Institute cubes | Ranks influence at 4, 2, or 1 VP each |
| 6 | Excess cards | Cards in hand above seven | Subtracts 10 VP per extra card |
| Position after ties | Multiplier | Example | Note |
|---|---|---|---|
| Most influence | 4 VP each | 8 influence = 32 VP | Tied leaders all use this multiplier. |
| Second-most influence | 2 VP each | 6 influence = 12 VP | Only applies below the leading amount. |
| All other players | 1 VP each | 3 influence = 3 VP | Useful but rarely a main scoring plan. |
| Two-player ghost row | Comparison only | 3 neutral influence | Can affect whether you are first or second. |
| Difficulty band | Base score | Matching card VP | Nonmatching card VP |
|---|---|---|---|
| High Red | 70 | 5 each | 2 each |
| Stained normal | 70 | 6 each | 3 each |
| Lurcher | 70 | 8 each | 4 each |
| Master Maker | 70 | 10 each | 5 each |
| Carver | 70 | 12 each | 6 each |
| Peerless Scarred | 70 | 14 each | 7 each |
| Total range | Likely meaning | What to audit | Common swing |
|---|---|---|---|
| Under 220 | Low synergy hand | Missed card bonuses, low Fleet, low Institute | One card combo can move 20+ VP. |
| 220-279 | Competitive table score | Check Helium, Sovereign, and excess penalty | Sovereign plus two Helium is 16 VP. |
| 280-319 | Strong finish | Review every conditional card phrase | Institute majority can add 20+ VP. |
| 320+ | Excellent combo result | Confirm hand count and negative card text | One extra card may still be net positive. |
Resolve card text first. Orange name-copy effects, Gray color treatment, banished-card references, and location-card checks can change the bonus field before the final arithmetic starts.
Compare Institute values, not seating order. Tied leaders all score 4 VP per influence, the next lower value scores 2 VP each, and everyone below that scores 1 VP each.
By the end of Red Rising, it doesn’t feel much like a board game at all. It’s more like taking an accounting test in a firefight. Hours have passed as you’ve shuffled ships around, brokered deals with politicians, and secured contract. And now everybody sits down for the hard part.
Scoring in this game is well known to be complex, since there are a dozen different mechanics to score in, and dozens more ways for those mechanics to intersect. Cards will have basic point values… But they’ll also unlock conditional bonuses based on how many Helium tokens you stockpiled, what planet you control, and who’s running it. Luckily, the math nerd upstairs did the math for us so we could argue about which bonuses applies to our particular hand setup.
How to Score in Red Rising
The part that trips up most folks is the scoring at the Institute. And it isn’t as simple as counting up the number of cubes. Rather, it’s scored based off relative control via a series of multipliers based on your position in the standings. For example, if you’re leading all other active players by yourself, then each and every cube you lay down counts as four points. If someone else have the second-highest amount of influence, they count as two points per cube, etc. Anyone below them gets just one point per cube. So there’s always a mad dash to be at the top of the heap, and quite frequently who wins or loses comes out before actual score is tallied. There are reference tables on the page that explain what happens when there’s a tie, and show you how the standings change. Note: The Sovereign token serves as a tiebreaker for first place.
And then there’s the hand-size trap. In the rules, you get away with seven cards in your hand. A lot of people don’t realize the rule until it’s too late. Any card after the seventh costs you 10 victory points. Ouch. That may seem severe, but it makes you really think about strategy at the end of the game: Do I take a chance on drawing another card because there might be something great in there? Or should I play it safe and not have any more than seven cards in my hand? There’s a calculator where you can enter how many cards are left in your hand and it’ll deduct those and show you what your net score will be if you take the gamble.
The other piece of the scoring puzzle comes from fleet positioning. Your ships will travel along tracks, which give you points based on how far they’ve moved. The temptation here is to always rush to maximize your score at the final point of the board. But oftentimes moving forward mean spending an action you could use somewhere else. If you can sit back and get Helium or swing influence earlier, sometimes that’s going to be a better overall position.
Helium is deceptive because it’s easy math, but powerful. Each token represent three points. That doesn’t increase as your ranking does, nor is it affected by ties. Instead, it’s simply solid, consistant value that compounds across the game. A player who collects ten tokens quietly may very well score higher then another who chases some flashy card combo.
Then there’s the Sovereign token, which adds another wrinkle. The Sovereign is worth ten points and acts as a tie breaker in first place situations. So now we have two people tied on raw score, but the person with the Sovereign is the winner. What was a draw becomes a win. Then you’ve got those ghost influence tokens that affect how you’re ranked at the Institute in two-player matches. Even if you dominate, they bring in an artificial opponent and knock your scores down.
Scoring Red Rising is precise and it will take time. Before adding up the final tally, you must work out all of the card abilities. A single overlooked penalty or small bonus can wipe out a solid lead. This page will walk you through each line item for Core Character Values, Board Adjustments. Nothing falls between the cracks. Each point is broken down into manageable pieces that allow you to see exactly what is contributing (or not) to your score.
Ultimately, it’s all about efficiency. Everything needs to pull its weight in several different ways. You want your hand to control important resources on the board but also to work with itself. There’s no getting around the math. Sometimes a focused strategy wins over a chaotic pile of high-value cards. Audit your end-game decisions with the calculator. Does the math really support your aggro plays? Or did you simply throw points away by playing too many cards? If you know how much your ambition costs you then you’ll be able to play smarter next time.