Notre Dame Plague Calculator
Plan rat marker movement, hospital reduction, trusted friend coverage, and prevention resources before the plague assessment.
| Current Rat Space | Spaces Before Overrun | Assessment Meaning | Prevention Planning Note |
|---|---|---|---|
| 0 to 2 | 7 to 9 | Low immediate pressure | Hospital can be timed for later rounds unless the visible rat total is unusually high. |
| 3 to 5 | 4 to 6 | Manageable watch zone | One or two hospital reductions usually keep the marker out of the danger band. |
| 6 to 8 | 1 to 3 | High pressure zone | Count every hospital marker and trusted friend before spending actions elsewhere. |
| 9 | 0 | Track limit | Only zero or negative net movement avoids the overrun penalty from this space. |
| Hospital Setup | Reduction Applied | Best Fit | Planning Warning |
|---|---|---|---|
| No markers, no friend | 0 spaces | Only safe at low rat marker spaces | Even a normal 3-rat assessment can become costly near space 7. |
| 1 marker in hospital | 1 space | Early period coverage | Protects against small totals but rarely fixes a late-round spike alone. |
| 2 to 3 hospital markers | 2 to 3 spaces | Midgame stabilizer | Can turn a common 2 or 3 total into no movement or a backward step. |
| Hospital plus trusted friend | Markers plus 1 | High-pressure prevention | Strongest when it also preserves supply markers for later sectors. |
| Visible Rat Total | Common Feel | Minimum Reduction at Space 7 | Minimum Reduction at Space 9 |
|---|---|---|---|
| 0 to 1 | Quiet assessment | 0 prevention needed | 1 prevention for a 1-rat card line |
| 2 to 3 | Normal pressure | 1 prevention for total 3 | 2 to 3 prevention to hold the limit |
| 4 to 5 | Severe pressure | 2 to 3 prevention | 4 to 5 prevention to avoid penalty |
| 6 | Maximum planning alarm | 4 prevention | 6 prevention or a penalty is coming |
| Game Moment | Rounds Remaining | Safe Target After Assessment | Resource Planning Focus |
|---|---|---|---|
| Period A opening | 6 to 8 | Rat marker 0 to 4 | Build enough hospital coverage to survive repeated card reveals. |
| Period B middle | 3 to 5 | Rat marker 3 to 6 | Balance prevention with keeping influence markers available. |
| Period C approach | 1 to 2 | Rat marker 5 to 7 | Prevent the final penalty without overcommitting scarce markers. |
| Ninth round | 0 | Any space at or below 9 | Only the current assessment matters; future buffer is irrelevant. |
For Notre Dame players there’s an additional level of dread: that rat marker on the board. Sure, it means giving up some prestige points; sure, it means shuffling around those cubes. But more than anything else, it feels like realizing you got the wrong answer to a math problem.
The plague track doesn’t care how nice your architecture is. All it sees is that marker moving and if you let it slip, it’ll make you pay. Maybe you put together hospital district over three turns. Great. Then someone checks the person cards during assessment. Because you forgot, its all for nothing in one round. Do they really do that?
Using the Plague Calculator
That’s where most folks mess up. They think about what they’ll gain and don’t consider what they’ll lose. The latter will gobble up the former whole.
But this is where the calculator kicks in. Plug in information about your location and what you’re preventing. It does the work for you, saving you the brain power required to keep several factor in mind at a time.
What’s it asking for? How many rats are currently on cards (that marker)? How many total rats is on the three face-up person cards? How many influence markers do you have in the hospital?
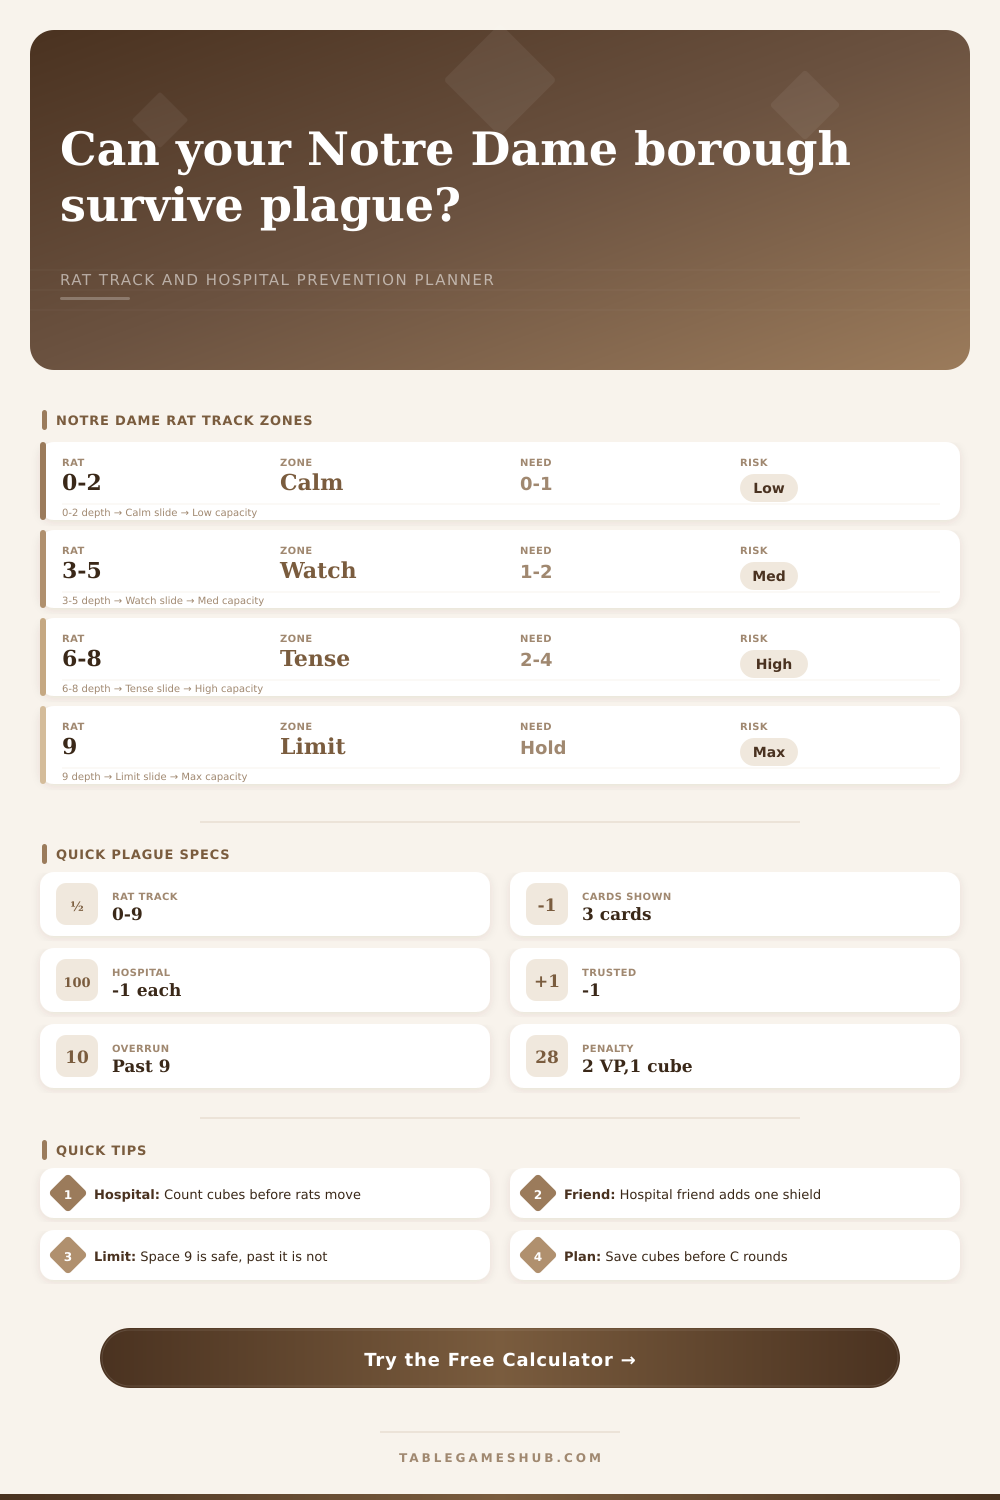
Every marker in the hospital will reduce the plague movement by one square. Having your trusted friend there also cuts down on that number. It sounds simple enough, but the challenge lies in when. You don’t want just to make it through next turn. You want to make it through while maintaining enough markers to construct something else.
And here’s the tradeoff: Each marker in the hospital represent a marker you’re not putting down in your own neck of the woods. You can literal see on the tool how far you have to reduce each of your markers to be within safety zone.
For instance, say you’re at space six, with four rats showing on the cards. You’ll want to go down by at least seven spaces, which means you’ll have to use at least three markers on your own (or two markers + your friend). Will you have enough cubes to pull that off without going broke on all the rest of your projects? The calculator will let you know.
It is small stuff, but it is important stuff. It’s what separates a win from a loss, sometimes just one reckless/wise marker.
On the page it has a table that breaks down what each space means in terms of risk zones. It lets you know when to relax and when to panic. Spaces 0-2 are calm. You can be lazy here. 3-5 is a watch zone. Pay attention but you aren’t in danger. 6-8 are tense. You should probably have a plan. You should have a plan. Be worried. 6-8 are tense. You need to have a plan. Be worried.
At space nine, you need zero or negative movement to stay alive. That’s the limit.
This is the part most players don’t get. The game picks up speed quickly in period B. The rat cards start appearing on person cards. Pressure starts to build. Waiting till period C to build your prevention? It is likely too late.
Consider your supply as a budget. You’ve got a limited amount of cubes, and you’d like to spend those on something which will give you points. However, sometimes you need an insurance policy. The trusted friend is a powerful insurance policy because she provides reduction without costing you a cube from your supply. It provides free prevention. Get him into the hospital and he buys you some breathing room.
Unfortunately, he’s not always around. In this case, you’re forced to make up difference in markers. Use the calculator to determine whether or not it’s worth it to do so. If the overrun would mean you don’t win the game, then you must prevent it. If you are going to go over regardless, it may be preferable to spend those markers toward a university or a cathedral.
Don’t attempt to optimize each individual round. That’s a recipe for paralysis. Identify the breakpoints and use the tool there. Stack your prevention in those rounds. Don’t intervene much during quiet rounds. Save the markers for the spikes.
It feels intuitive. But it’s hard to execute under pressure. The board is noisy. Too many decisions. A clear number to aim for will help you cut through the noise. Know exactly what you need to do to stay on track.
But the plague is no enemy you’ll beat. No, it’s a force you’ll have to deal with, one like gravity: Always present, dragging your marker towards the red zone. It is unstoppable. All you can do is stall its pull.
The victors among these players understand the track. They don’t pretend to dismiss it. They don’t wish upon luck. They prepare for the worst and pray for the best. They use all tools at their disposal to protect their district. Finally, whether your borough rises or falters rests in the hands of your ability to control the rats. And that is a story worth thinking about before you write it.