Mandala Stones Calculator
Score a color action, top-stone cleanup, mandala board bonuses, objective-card estimate, endgame pressure, and next-pick color odds from the exact tower positions on your player board.
1Mandala Stones Presets
2Score Action Setup
3Five Tower Slots
For color scoring, matching top colors are included automatically. For cleanup scoring, set each tower to Include or Skip.
Tower 1: height variety
Tower 2: short stack
Tower 3: height three
Tower 4: tall stack
Tower 5: color spread
4Next Pick Odds and Stone Pool
Formula Breakdown
5Game Component and Spec Grid
6Mandala Stones Reference Tables
| Player board slot | Color-score formula | Best height or input | Calculator field |
|---|---|---|---|
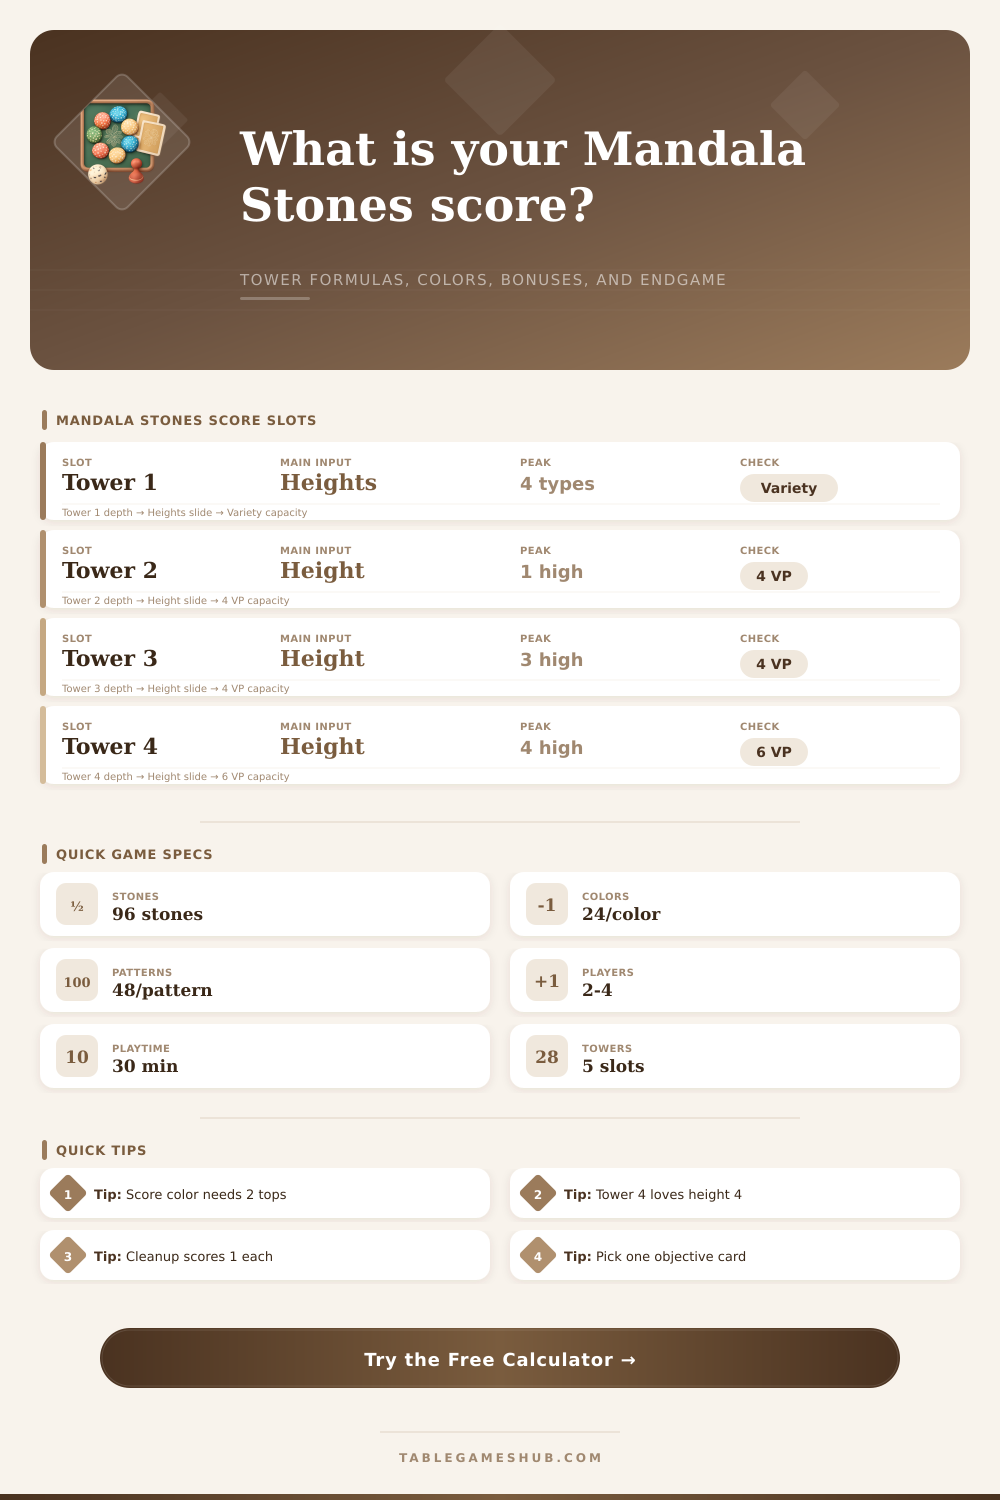
| Tower 1 | 1 VP per different tower height visible on your player board | Four different non-empty heights | All five tower heights |
| Tower 2 | Height 1 = 4 VP; height 2 = 2 VP; height 3 or 4 = 1 VP | Height 1 | Tower 2 height |
| Tower 3 | Height 1 = 1 VP; height 2 = 3 VP; height 3 = 4 VP; height 4 = 1 VP | Height 3 | Tower 3 height |
| Tower 4 | Height 1 = 1 VP; height 2 = 2 VP; height 3 = 4 VP; height 4 = 6 VP | Height 4 | Tower 4 height |
| Tower 5 | 1 VP plus the number of different colors in that tower | Four distinct colors | Tower 5 distinct colors |
| Action type | Requirement | Base scoring | Mandala placement |
|---|---|---|---|
| Score a color | Chosen color appears on at least two top stones | Each matching tower scores by its printed slot formula | Move all scored top stones to the mandala board |
| Score top stones | Select any number of top stones from your towers | 1 VP per selected top stone | Move selected stones to the mandala board |
| Mandala bonus | Covered spiral spaces show +1 or +2 | Add the printed bonus to the score action | Score while placing stones inward to outward |
| Game end check | A placed stone covers the matching hand icon | Finish the round so players have equal turns | Use the next matching icon space as the trigger input |
| Component or spec | Official count or range | Scoring relevance | Calculator use |
|---|---|---|---|
| Mandala stones | 96 total; 24 per color | Color odds and future pick planning | Target-color stones out and total stones out |
| Patterns | Two patterns; 48 stones per pattern | Artist movement filters which stones can be taken | Artist pattern match rate |
| Player board | Five tower slots | Slots have fixed, different scoring formulas | Tower 1 through Tower 5 fields |
| Objective cards | Keep two, score one at game end | Final points can swing the result | Objective card estimate |
| Player range and time | 2-4 players; about 30 minutes | Hand icons pace the endgame | Player count and trigger space |
| Board state | Typical calculator pattern | Strong scoring target | Watch before scoring |
|---|---|---|---|
| Early pair | Two matching tops, low mandala bonuses | Tower 2 at height 1 or Tower 4 building tall | Do not empty a slot you need for the next pick |
| Midgame burst | Three or four matching tops | Tower 1 variety plus Tower 4 height | Count +1 and +2 spiral spaces exactly |
| Cleanup turn | Selected top stones score 1 each | Remove blockers to reveal better colors | Cleanup may be lower VP but improves next color score |
| Endgame pressure | Few spaces to matching hand icon | Immediate score plus objective estimate | A large placement can trigger the final round |
7Scoring Tip Boxes
Color score check: a color action needs at least two matching top stones. If only one tower matches, switch to cleanup or plan another pick first.
Tower slot check: the same stone can be weak or strong depending on its slot. A height-4 top is only 1 VP in Tower 3 but 6 VP in Tower 4.
Mandala board check: add +1 and +2 spaces separately, then compare the number of placed stones against the next hand-icon trigger space.
Objective check: estimate only the better of your two objective cards for final scoring, since Mandala Stones lets you score one of them.
At this point you’ve constructed a tower that’s four stones tall. It’s stable, well-positioned, and poised to net six points in the fourth slot. But looking down at the board, you notice that its color matches is weak. Your cleanup options is also poor.
Mandala Stones turns into a game of resource management with the central spiral closing on the player count icon. Your goal is to maximize your points without tripping the turn-ending trigger. To find this sweet spot between offense and defense, it helps to have a way to run the numbers.
How to Play Better
If you’re playing with top colors, it’ll spit out a number for you based off current tower height. And if you plug in the current top colors and tower heights? It will tell you whether you should go now, or wait until there’s a better fit in the pattern.
That’s where the tension lies: Every action moves the endgame clock forward. You score points by moving your stones into the spiral as they fill up the mandala board. Eventually this will trigger last round. Then there’s the danger of going after a lower-valued color because you need a couple of turns to get back in play. Yeah, it scores a few points but then there’s the risk of running out of moves before you can play your objective cards.
The key to beating that clock is understanding how the five tower slots function. A stone isn’t simply a point value; it’s a potential value depending on its placement in each slot. In Tower Three, a height-four stack are worth a single point. In Tower Four, it’s worth six. These are formulas, and they’re all different. The calculator adds them together for you and shows you what each move cost in actual points.
Breaking up a set may seem like it will result in losing two points. If the move makes room for a critical stone to enter a high-value slot, the net effect is often greater.
For many people, the problem is color cleanup. When your colors don’t line up, the temptation is to rush and take isolated points. It feels efficient but you have to weigh that against the state of board. But consider how the rest of the board look. Is there an opportunity for a better color? Did clearing those stones open up adjacent space? It can be worthwhile to sacrifice some points if it results in a better board position.
The tool calculates the tradeoff between raw points gained and what you’d get from the clean-up option. It also takes into account how much of the middle spiral you’re going to have covered with bonus spaces. Those plus-one and plus-two locations may be tiny, but they accumulate fast when every half-point make a difference late in the game.
As the game unfolds, the stone pool causes some anxiety. Not only do you have to know what’s on your board, but also what’s remaining in the bag. Do you depend on purple stones? If twelve of them are already gone, you’ll need to adjust your plans. There’s a built-in guess of the odds for pulling that color next. This forces you to accept reality instead of hoping things will work out. It’s easy to ignore the drying up of resources until it’s too late. Keeping track of them allow you to pivot when your main scoring engine sputters.
Each row is a formula for the action or the spot, and those tables in particular lay it all out so you can remember which spots are better then others. There’s no need to commit them to memory. Yet knowing, for example, that Tower Four requires height and Tower Two prefers short stacks will completely change how you approach all the pickup phases. It will shift the way you think from collecting stones to creating unique profiles for each spot.
Score as many points as you can now or keep your options open and play out? It turns out the best play is often the latter. You get the data from the calculator, you decide if you’re willing to take the risk. Architectural patience becomes a game where you watch the spiral close in until you find yourself at that endgame trigger: when you know you’ve made the most of each and every turn.
It should of been worth it for any player who wants to master the moddern rules.