Mahjong Dealer Repeat Calculator
Update dealer repeat status, honba, riichi sticks, payment add-ons, and East or South round progress after a completed hand.
🀄Presets
⚙Hand State Inputs
Updated Table State
🎯State Comparison Grid
🧮Logistics Snapshot
📋Reference Tables
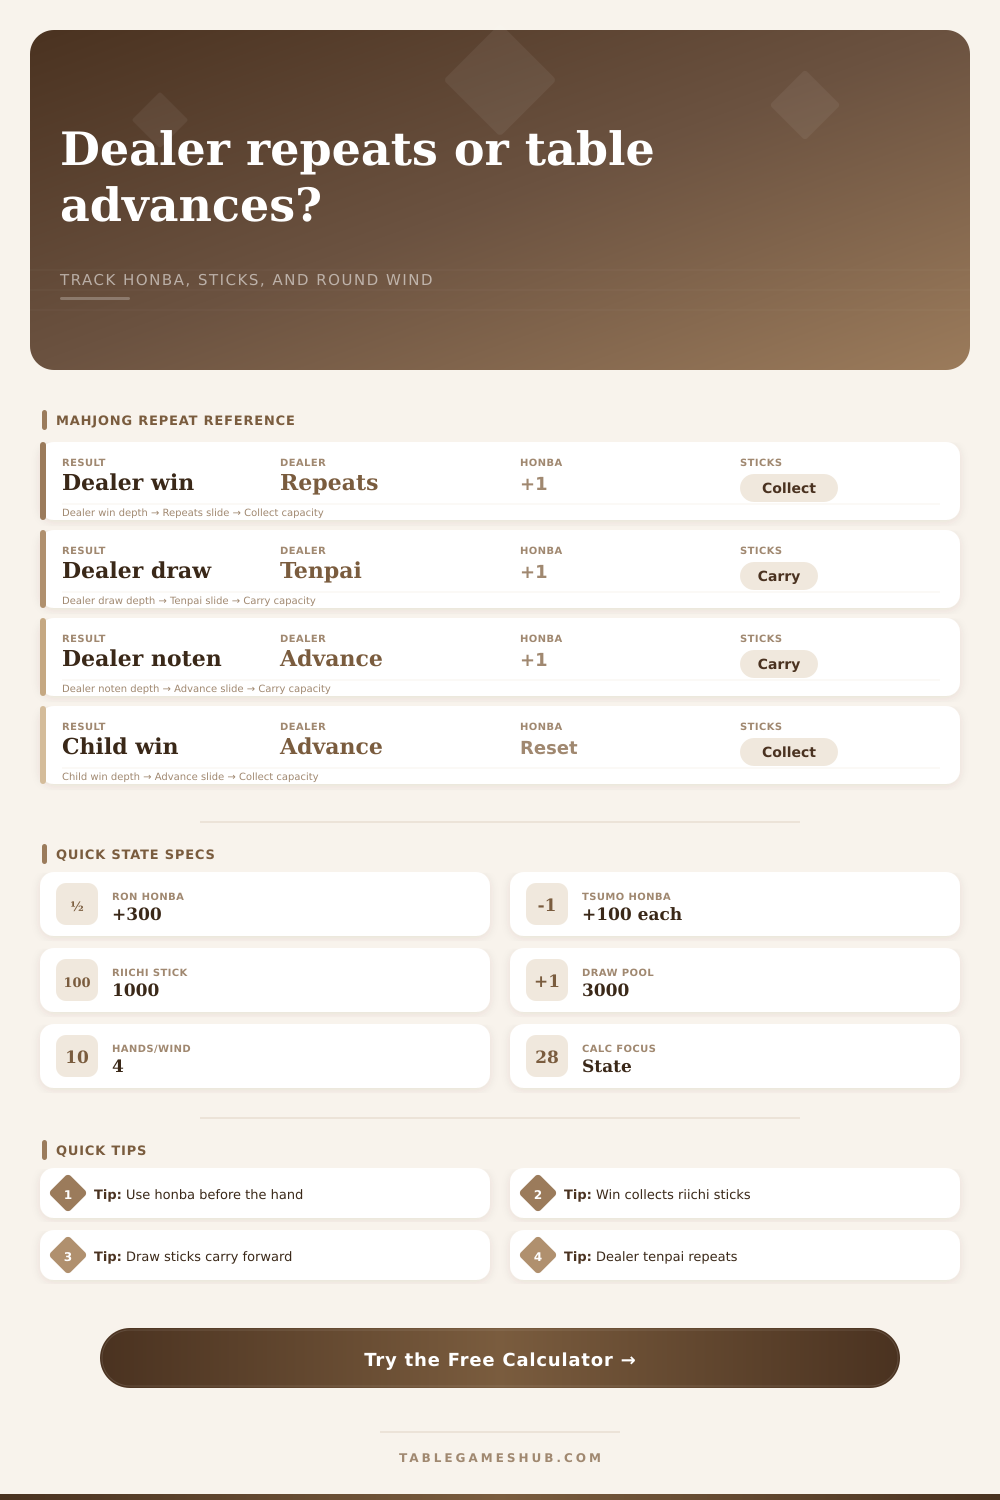
| Hand result | Dealer flag | Next dealership | Honba after result |
|---|---|---|---|
| Dealer wins by ron or tsumo | Dealer win | Same dealer repeats | Current honba + 1 |
| Exhaustive draw and dealer is tenpai | Dealer draw tenpai | Same dealer repeats | Current honba + 1 |
| Exhaustive draw and dealer is noten | Dealer draw noten | Dealership advances | Current honba + 1 |
| Non-dealer wins by ron or tsumo | Child win | Dealership advances | Resets to 0 |
| Abortive draw or redeal | Abortive draw | Same hand commonly repeats | Current honba + 1 |
| Honba before hand | Ron add-on | Tsumo add-on | Total tsumo add-on |
|---|---|---|---|
| 0 honba | +0 from discarder | +0 from each payer | +0 total |
| 1 honba | +300 from discarder | +100 from each payer | +300 total |
| 2 honba | +600 from discarder | +200 from each payer | +600 total |
| 3 honba | +900 from discarder | +300 from each payer | +900 total |
| 5 honba | +1500 from discarder | +500 from each payer | +1500 total |
| Riichi stick event | Before hand | After hand | Score effect |
|---|---|---|---|
| Dealer wins | Visible sticks remain countable | 0 sticks on table | Winner gains 1000 per stick |
| Non-dealer wins | Visible sticks remain countable | 0 sticks on table | Winner gains 1000 per stick |
| Exhaustive draw | Visible sticks remain countable | Same sticks carry | No direct stick payment |
| Abortive draw | Visible sticks remain countable | Same sticks carry | No direct stick payment |
| Current hand | If dealer repeats | If dealership passes | Wind note |
|---|---|---|---|
| East 1, 2, or 3 | Same East hand | Next East hand | East round continues |
| East 4 | East 4 repeats | South 1 | Round wind changes |
| South 1, 2, or 3 | Same South hand | Next South hand | South round continues |
| South 4 | South 4 repeats | End check | Ending rules vary by table |
💡Calculation Tips
Once the final tile has been flipped over in a game of mahjong the pressure moves from our hands onto table: Which players will keep the dealer’s chair? What impact will those riichi sticks has on the upcoming round? These are all questions on everyone’s mind for that brief instant before play begins again.
It is a small administrative moment, but getting it wrong can disrupt a long game of mahjong. It becomes even more frustrating if you’re attempting to concentrate on your own game or just enjoy conversation. Just plug in the outcome of the hand, and the calculator above do the math for you, saving you from having to remember every edge case.
How to Use the Mahjong Calculator
The key to all of this is what I call the dealer repeat rule: When the dealer wins, they remain the dealer; When the dealer is in tenpai but draws, they remains the dealer. It’s only on the draw without tenpai OR loss that the dealer will pass the dealership onto the next player. This puts the dealer in a strong position as they are able to repeat and win more, whereas non-dealer has to be successful just to earn a shot at seat.
By removing the “guess work” aspect and helping you instantly know if it’s an advance hand or a repeat, the tool take away some of the chance for arguments or awkward pauses. But there’s more: These counter sticks are a pressure cooker. Each time someone doesn’t get final winning call, they have to pay an even higher amount of points in addition to the scores of the hands already played. If the winner was tsumo, they recieve a hundred points from everyone who paid. If it was ron, they gets three hundred from each payer, but only after the count increases by a certain number of honba sticks. That’s the difference, and it adjusts the odds against being aggressive or not at any given time. When honba is heavy, the payoff to being right get larger, and so does the punishment for getting wrong. You can check the table on page above for exact value of all those sticks before moving onto the next round.
Honba alters payments while riichi sticks introduce a different dynamic because they gets collected outright if you win the hand. That is, if you win either via tsumo or ron, you collect all the sticks that are currently on display. If there is a draw at the end of the hand, these sticks stays on hold until the next player wins the hand to clear them. So over time, a string of draws can accumulate a pretty hefty potential payoff, and the calculator keeps track of the distinction quite well. It avoids confusion between the one-time riichi stick collection and the accumulating honba. This is a small but important detail for keeping scores accuratey.
For most casual player, it’s the turn from East to South that throws them off. In the East round, it’s all about establishing the starting rank. In South, it’s all about closing out the standing. That’s why it matters so much to know when to stop, as soon as you can determine the game has moved to South one or ended on South four, the tool will let you know. If no player hits ten thousand points, some people will stretch this round out by another few hands, but typically the round end once checked. Knowing how far along you are helps you manage risk better in those last few hands.
Eventually, you’ll realize there’s a rhythm to mahjong play. When you put aside bookkeeping, you can read your opponents’ hand from their discards. You can manage how your hand shapes up. You can decide when to go all-in with a riichi declaration. Once the correct tools are in your collection, the administrative work fall into the background. You spend less time arguing about who gets to hold the dealer seat. You spend more time playing the game.
Next time you sit down at the table, allow the calculator to keep track of the honba count and repeat status so that you can stay focused as the tiles move around the table and the scores change. The tiles is what matter in the game, not the tally. When the math stays simple, everyone will have an even better time playing mahjong.