Hallertau Score Calculator
Total Community Center progress, sheep, unused jewelry, field strength, stored goods, tools, and up to four played scoring cards.
🧭Score Presets
🏘Community Center and Progress
Enter the VP visible in your Community Center window, then audit how far the five craft buildings progressed. The progress estimate does not replace the printed VP window; it helps catch missed building movement.
🐑Sheep, Jewelry, Tools, and Goods
🌾Fields and Crop Cycle Audit
For final goods scoring, add the current row value of each field tile, whether planted or empty. The cycle estimate previews how many goods a still-planted board would have produced during harvest.
🃏Played Card Scoring
🧮Live End-Score Grid
📚Reference Tables
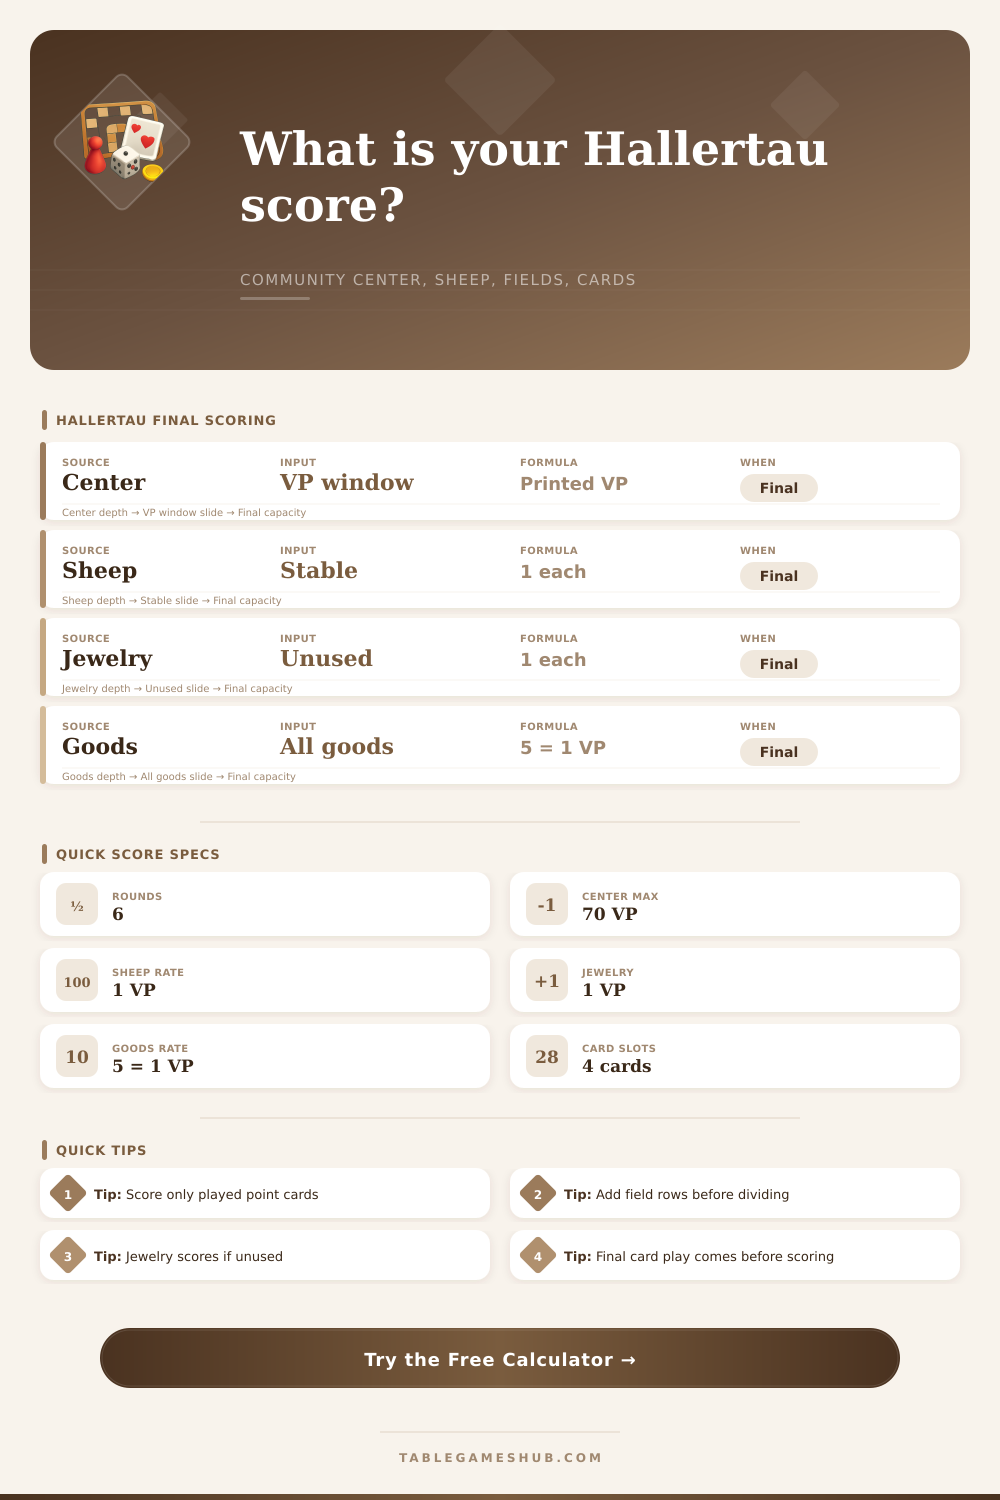
| Final source | Input | Formula | Notes |
|---|---|---|---|
| Community Center | VP window | Printed VP | 0, 18, 34, 50, 70 |
| Stable sheep | Sheep count | 1 VP each | Only surviving sheep |
| Unused jewelry | Jewelry count | 1 VP each | Spent jewelry is gone |
| Played cards | Card VP | Card text | Hand cards do not score |
| 5:1 pool item | Count as | Example | Scoring |
|---|---|---|---|
| Field row value | Current row | Row 4 = 4 | Add to pool |
| Crop goods | Each cube | 18 crops | Add to pool |
| Other goods | Each token | Milk or wool | Add to pool |
| Tools | Each tool | Ready or used | Add to pool |
| Crop cycle | Phase | Calculator use | Reminder |
|---|---|---|---|
| Fallow fields | Empty fields rise | Audit projection | One empty rises extra |
| Harvest | Planted fields pay | Yield estimate | Then fields slide down |
| Sowing | Place crops | No VP by itself | Creates later goods |
| Final score | After card play | Use actual rows | Do not project twice |
| Progress audit | Strong sign | Watch item | Score effect |
|---|---|---|---|
| Worker window | 11 to 12 | Center not scoring yet | Future actions |
| 18 VP window | Late center push | Card plan needed | Moderate final VP |
| 50 VP window | High center | Resource drain | Major final VP |
| 70 VP window | Max center | Confirm boulders | Huge final VP |
💡Scoring Tips
Hallertau finishes suddenley. One minute, you’re working your worker and crops, and then it’s done, so what do you do with all these resources? There is an easy answer: head over to your community center for the victory point window. But everything else is on the table. Goods stacked up in your supply area, fields at various stages of harvesting, sheep in your stable, jewelry tokens laying around waiting to be used. And then there’s the points.
When the adrenaline subsides, it’s easy to lose track of a token or not count that last row of field correctly. Because in this game, the margin of error is thin, particularly if you’ve got four people trying to score points from that same point window.
How to Count Your Points
Most of your points comes from the community center. If you clear that boulder field well, your score will usually be 18, 34, 50, or 70. The round closes after this, locking in the score with no room for argument. It’s the little things where things get tricky.
Sheep are simple: they scores one point each. They’re low yield, but they’re high security since they don’t require conversion. Jewelry’s similar, it rewards you for saving your tokens instead of converting them into actions. On the one hand, the encouragement is odd. It feels counter-productive to hold back on action, but any unspent jewelry turns into straight-up points at the end.
But the fields and goods pool gets tricky. And this is where the 5-to-1 thing enters the picture. First, find the total of everything in your pool. This includes the value of your fields based off how far along they are in the rotation (rows 2 through 5), plus any animal products, tools, or other crop goods you have. Then, divide that total by five and round down.
Sounds easy? Except then you remember a field on row 5 is worth more then one on row 2, and an empty field increases in value as it cycle through the fallow phase. Then you also need to remember to account for the tools, and not overestimate how many rows your fields occupy after final harvest slide. The calculator at the top will do the math for you when you plug in the numbers; it’ll save you some of the hard thinking required to divide a pool with different type of values. This allows you to know which tradeoff is best for you (and thus avoid end-game regret).
Do you want that one more point in the middle? Well, maybe that will cost you a whole category point in the pool. Even if you get the higher point value then, it’s still a net loss. The page has a handy reference table that shows what each number requires and gives. Do you want to put all your resources into action slots, or would you rather take security of guaranteed sheep/jewelry points? In some cases, holding onto a tool is better than executing it. You should of only do this when you’re certain you’ll have the goods to buy another slot at the five-point mark.
Then there are the playing cards. Your card hand isn’t dead weight at the end; you can play point cards after round six before final scoring. So use those final actions wisely to either directly boost your score or set up bonuses. The trick here is to know what you already have on the board so you don’t duplicate efforts. Maybe a card that scores goods isn’t as good as a card that scores buildings if your center is low. It’s all about fitting the final pieces into the gaps left by your earlier strategy.
Accounting is clean and consistant. Don’t leave points on the table due to careless counting. If you’re careless about counting, you can’t brute force your way to a victory. Before calling it done, take the time to check your good stack and field rows. Part of the satisfaction of Hallertau is in the strategy but also in the clarity around why you did or didn’t win. That kind of clarity transforms a frustrating scramble into a moddern game night when everyone knows who did what right.