Fresco Score Calculator
Total cathedral restoration, bishop positioning, altar work, portrait income, paint mixing, mood pressure, apprentice capacity, market buys, and final end scoring.
🎯Score Presets
Score Breakdown
📝Game State and Restoration Inputs
⛪Altar, Portraits, and Workshop
🧑Mood, Apprentices, Market, and End Scoring
🧮Fresco State Grid
📊Scoring Reference Tables
| Score Source | Input Used | VP or Resource Rule | Calculator Treatment |
|---|---|---|---|
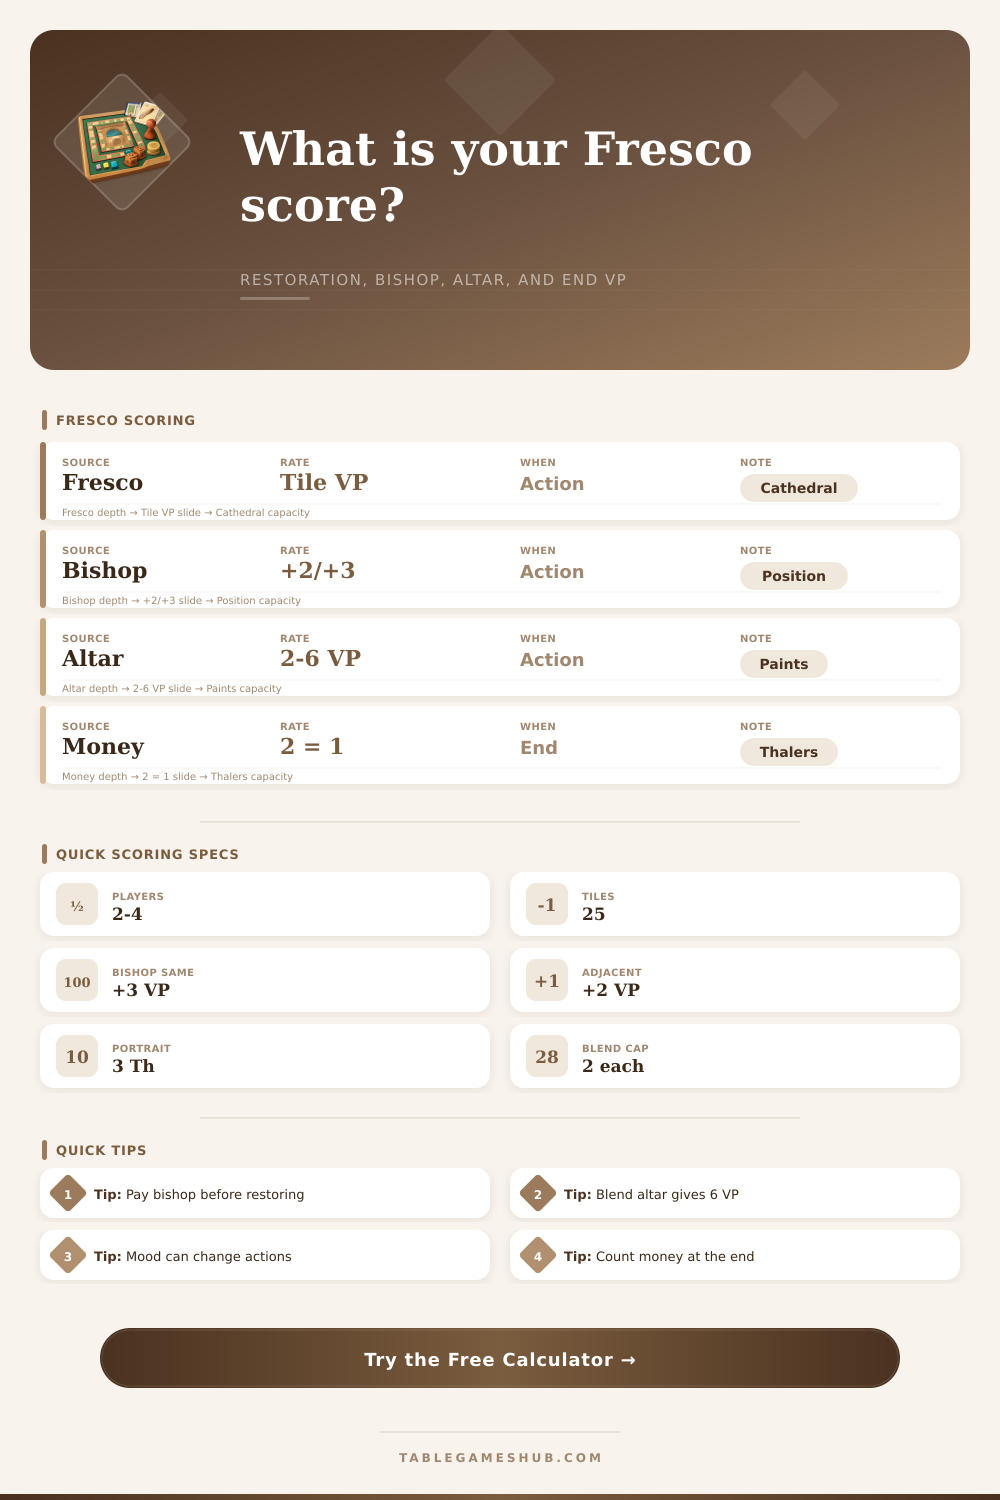
| Fresco restoration | Printed fresco tile VP | Score the value on each restored segment | Entered as a summed VP field |
| Bishop on segment | Same segment restores | +3 VP per matching bishop position | Automatic bishop bonus |
| Bishop adjacent | Adjacent restores | +2 VP per adjacent bishop position | Automatic bishop bonus |
| Altar basic | Basic altar plus substitutes | 2 VP plus 1 VP per blended substitute | Base and wildcard fields |
| Altar blended | Full blended altar | 6 VP for orange, green, and purple | Full blend altar field |
| End money | Net Thalers | Usually groups of 2 Thalers | Selectable house or module rule |
| Planning Area | Apprentice Effect | Primary Output | Score Audit Note |
|---|---|---|---|
| Market | Buy paint tiles | Paint inventory | Earlier wake-up improves choice but can hurt mood. |
| Cathedral | Restore fresco or altar | Immediate VP | Check bishop position before paying or scoring. |
| Studio | Paint portraits | 3 Thalers each | Portrait module cards can add direct VP or rewards. |
| Workshop | Blend paint twice | Secondary colors | Capacity is apprentices times two blend actions. |
| Theater | Improve mood two spaces | Action stability | High mood may add an apprentice; low mood may remove one. |
| Preset | Main Scoring Lane | Best For Checking | Manual Field To Watch |
|---|---|---|---|
| Balanced Restoration | Fresco plus normal bishop | Typical base-game final round | Printed fresco VP |
| Bishop Sprint | Heavy same-space bonus | Paid bishop movement value | Paid bishop moves |
| Altar Specialist | Repeated altar scoring | Basic versus full blend altar | Wildcard substitutes |
| Portrait Funding | Studio money engine | Income and end money conversion | End money rule |
| Big Box Audit | Module scoring stack | Portraits, requests, special colors | Other end scoring VP |
💡Scoring Tips
After a round, Fresco’s board appears tidy; however, your scorecard is rarely legible. You’ve bought some paints, placed that pesky bishop, and replaced several tiles, but reading your points doesn’t becomes easy until the final tally. Having an actual scoring device makes sense here, as it explains exactly what caused you to gain/lose points. After inputting your income values and restoration amounts, calculator will do the rest for you.
No more scribbling bishop placements during each phase of every turn! Printed points appear concrete, so most players spend their time on the frescos. Tile have four points? That’s what I’m counting on! But final value is affected by where the bishop is positioned. Aligning your restoration to the bishop on the same segment adds an additional three points. If they are adjacent, you only earn two. Alignment is important.
Why Use a Scoring Calculator
This make it a mix of spatial planning and math, as you have to plan when and where to restore the correct tile. It’s arithmetic made up off space, and page’s reference table explains it all quickly enough.
Altar scoring is overlooked by many starting players, who assume it’s less important than the central cathedral board. But it’s not! Two points for a simple altar repair, plus one more for each painted blend above that. With three paints… Say, green, purple and orange, you’re looking at an immediate six points from the action, with no reliance on where the bishops land. And that speed beats slowly building up frescos, as there’s no need to wait around for your luck to change regarding bishop placement. The tool also shows basic and blended scores separately, so you know if that gap in the race came from a simple fix or a fancy paint job.
The same kind of oversight can affect how you generate income, but having studio apprentices will keep your cash flow stable. Studio apprentices paints portraits for three thalers each, providing steady liquidity throughout the round. And those thalers won’t evaporate. At the end-of-game audit, they’ll be converted directly into victory points. Why? Because money matters. The standard conversion rate is one point per two thalers, although a house rule may adjust this number.
Did you gain more long-term by keeping the thalers, or by spending them on bishop moves? That’s what the calculator sums up: the real cost of waiting around, including any thalers still lingering in your coffers. It’s also worth noting that your apprentices aren’t endless sources of action, giving mood management some strategic value. Having a higher level of mood affords you another apprentice; lower mood will costs you one. This have knock-on effects on your ability and hence number of actions per round. For example, if you repositioned the bishop for better placement, but failed to maintain mood levels through theater actions, you could run out of space to place your apprentices the following turn! The tool keeps tabs on these mood-modifiers against your currently-active apprentice capacity, helping you avoid over-promising on your action budget.
The same holds true for the market, you need to be disciplined there too; running out of money buys you nothing. That said, knowing what colors you’ll have to blend down the road can help you do just that, but costs you money in the short term. There’s not one right way through this; it depends on where you are at any given time and what tradeoff makes sense to you. While some people save up market tiles in order to create their own perfect combination, other people wants to take advantage of an opportunity to restore immediately. The calculator gives you numbers so you know if spending all that money on the market was worth it. It shows if it’s worth getting bonus points from special colors or extra points on the altar.
And then there’s this: finally you’re reconciling all those streams into one big total. Because everything is an accumulation of value, portrait awards, module cards, and remaining resources are part of that end-of-game tally. You take those things, add them together (subtracted for penalties), and see where you stand. Adding doesn’t matter if you don’t know who made the right calls, did certain decisions compound or stall out?
Next time you’re about to move, score it first. Understand the value of an adjacent pair of bishops or the combined power of those two bishops working together, and you’ll see just how different the entire board changes for you. They’re there. These points are waiting to be claimed by anyone who understands the math in the art.