Caylus Score Calculator
Total a Caylus score from the live prestige marker, castle batches, section favors and penalties, royal favor VP, residences, buildings, prestige buildings, resources, deniers, and bailiff timing.
Choose a Caylus end-state or timing scenario, then adjust every field to match the player's board. Section scoring can be switched off when it is already included on the prestige track.
Dungeon
Walls
Towers
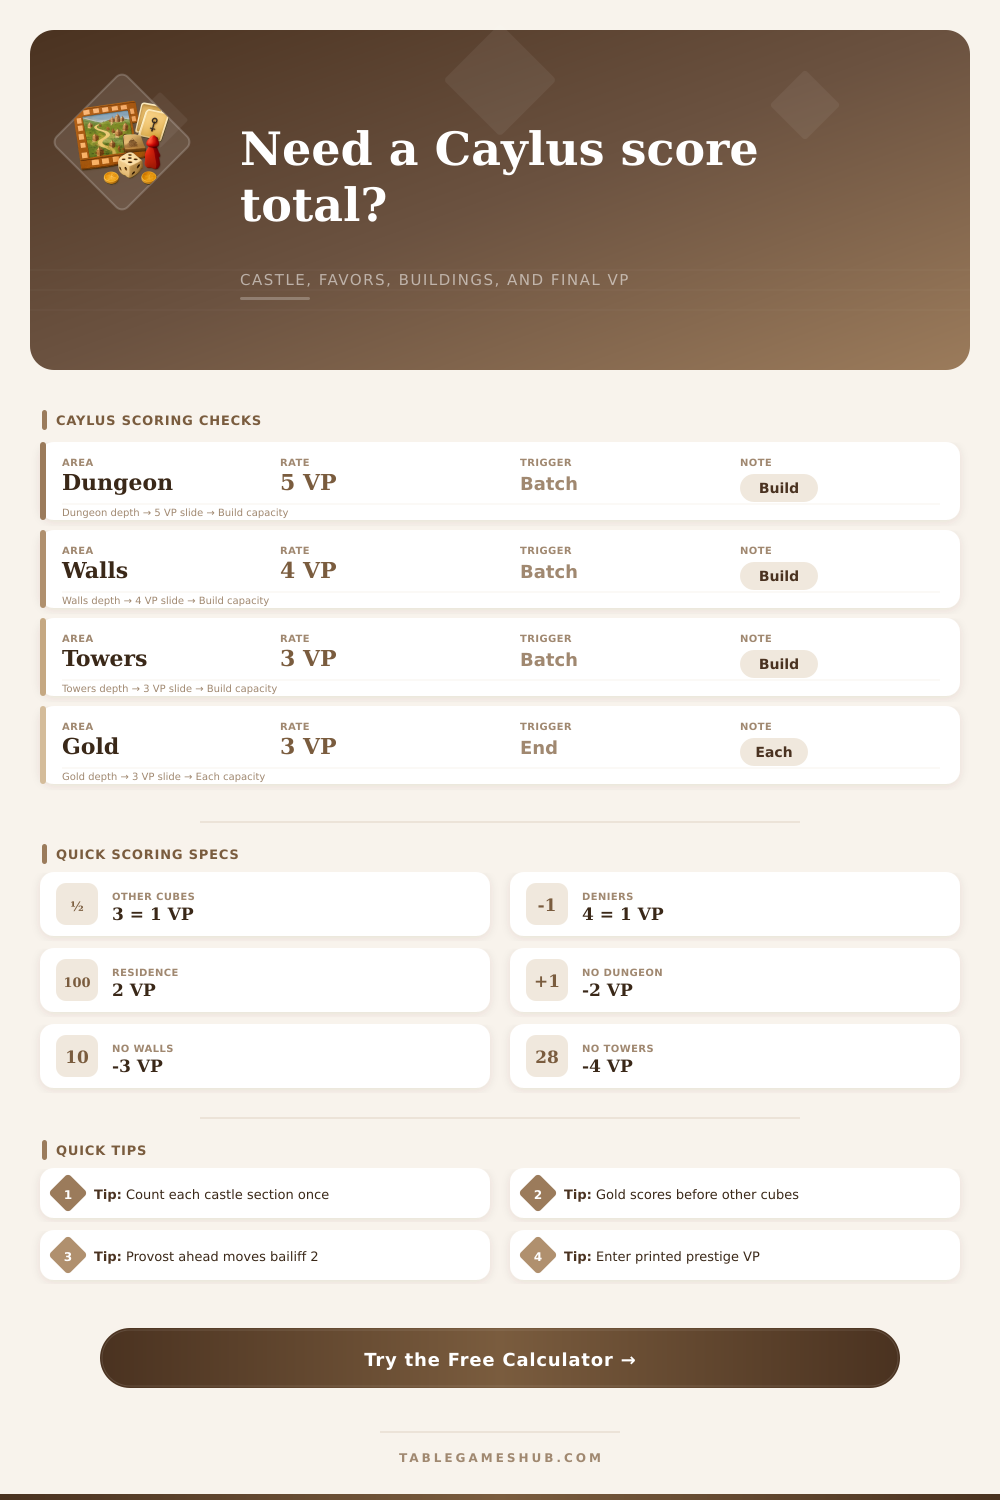
| Section | Batch VP | No House Penalty | Royal Favor Thresholds |
|---|---|---|---|
| Dungeon | 5 VP per supplied batch | -2 VP if zero houses | 2 or more houses: 1 favor |
| Walls | 4 VP per supplied batch | -3 VP if zero houses | 2 houses: 1 favor; 3-4: 2 favors; 5 or more: 3 favors |
| Towers | 3 VP per supplied batch | -4 VP if zero houses | 2-3 houses: 1 favor; 4-5: 2 favors; 6 or more: 3 favors |
| Item | Calculator Field | Scoring Rule | Timing Note |
|---|---|---|---|
| Gold | Gold cubes | 3 VP per gold cube | Count at final scoring after the towers section ends. |
| Other resources | Food, wood, stone, cloth | 1 VP per complete set of 3 non-gold cubes | Remainders do not score. |
| Deniers | Deniers remaining | 1 VP per complete set of 4 deniers | Remainders do not score. |
| Bailiff move | Provost position | Advance 2 if provost is ahead; otherwise advance 1 | Reaching a marker or completing a section triggers section scoring. |
| Category | Common Source | Where to Enter | Check Before Adding |
|---|---|---|---|
| Residences | Green residential buildings | Residences built or owned | Do not add again if the 2 VP was already marked during play. |
| Stone and special buildings | Printed or immediate VP on built town buildings | Stone and special building VP | Use only uncounted points, because many builds score immediately. |
| Prestige buildings | Blue buildings built over residences | Prestige building printed VP | Add printed values and any confirmed building-specific bonus. |
| Royal favors | Castle counts, joust, church, and buildings | Royal favor VP or favor value fields | Separate direct VP from resources or building discounts. |
Castle counts: If the dungeon, walls, or towers count table was already resolved during play, leave that section checkbox off and keep only its batch VP if those points are still missing.
Favor values: Royal favors are flexible, so the calculator separates actual VP already chosen from planned value for unspent or forecast favors.
Provost timing: Workers beyond the provost do not activate, then the bailiff advances after the turn. Use the timing card to see whether a count is likely to happen now.
End scoring: Count gold first at 3 VP each, then group all non-gold cubes in threes, then group deniers in fours. Leftover pieces are ignored.
Usually, by the time we get to the end of Caylus it doesn’t feel like a victory lap. After three hours arguing about stone cubes, hoarding resources, and putting down workers, it feels more like an audit. The game is done. It is time to see if any of that work turned into point.
Enter the score calculator. It takes the difficulity out of the equation so you can worry about number instead of the math. The math isn’t difficult, it’s the order of operations. Caylus has a lot of moving parts. How do your resources, buildings, and residences counts? What about your deniers? When does your live prestige marker go up? When does the bailiff reach a section of your castle (which then scores points)? Do you remember the timing of that final worker movement? It’s not easy to calculate correctly without making mistake, and that’s why there is a calculator to keep track of math.
Why You Need a Score Calculator for Caylus
Second, take stock of what’s already been marked off; it’s not complete, but each prestige track add up. That means that if you have residence points that were earned while playing, they’re probably included in your marker. If you hoarded them in hand to avoid double-counting, they should of be added now. Enter your existing marker number into the tool and the tool will split things out so that you can include the ones you didn’t count yet.
Why does it matter? One frequent mistake is to double-up on residence points. Players often think that when they build something, it goes on their score as soon as it’s built…and then they put it on their final score too. It happens when players assume a built building scores immediately and again at the end, or vice versa.
Adding another complication to that equation is Castle scoring. Each tower, wall, and dungeon has its own set of majority/total values. Majority placement earns you favors and victory points from the count tables, while immediate points are granted for supplying batches. However, you only earn those points if you were in line to get them; if you didn’t get counted because the bailiff skipped your section, or because it was empty and never got filled, those points goes away, and you need to catch up somehow.
Thankfully, the rates are spelled out nicely on the reference table, which details how many points each section will give you per batch, as well as how much you’ll lose if you don’t have any houses there at all. If you have zero houses in the dungeon, you lose two points. This penalizes players who neglect to put any house in a section; they need to at least try something.
There are certain items that must be grouped up before being converted into end-game resources. Gold cubes is three points each; easy enough. Other resources like wood, stone, or cloth score one point per set of three. Deniers work similarly, but they are scored in groups of four.
This is where hoarding backfires. Extra resources aren’t worth anything. If you hold two gold and two deniers, those deniers are worth nothing. Those deniers won’t count for nothing. A pair of leftovers from a group of five resource isn’t anything either. The calculator handles those divisions for you, so you don’t even have to notice that all those leftovers were wasted.
The last variable in the scoring process is timing. Where you move and when are equally important: they both determine how far the bailiff moves in Caylus. At the end of a player’s turn, the bailiff moves either one space forward (if the bailiff is behind your provost) or two spaces (if your provost is ahead of the bailiff). That little bit of mechanics could easily swing a game by five or six points in the end… which is something easy to overlook in the heat of the moment! To help you remember, the tool has a field for noting whether this timing was relevant. If it was, you give them extra spaces to match.
Caylus isn’t so much about adding numbers as it’s about matching your strategy to what happens. Did that long play in wall pay off? Was it better to buy a cheap building or hold deniers? That’s where the calculator comes into play. It will show you exactly how each move affect the total and let you know if that long play paid off, or if you should of held on to those deniers.
After the math is done, all you’ll be left with is the pride of knowing you realy did add up points.