Terra Mystica Spade Cost Calculator
Calculate terrain wheel distance, free spade coverage, worker or priest payment, faction exceptions, spade scoring, and whether a dwelling can be built from the same transform action.
Use this for base Terra Mystica terraform planning. It follows the seven-terrain transformation cycle and flags the special timing cases that matter for power actions, bonus cards, cult bonuses, Giants, Halflings, and Darklings.
Terraforming result
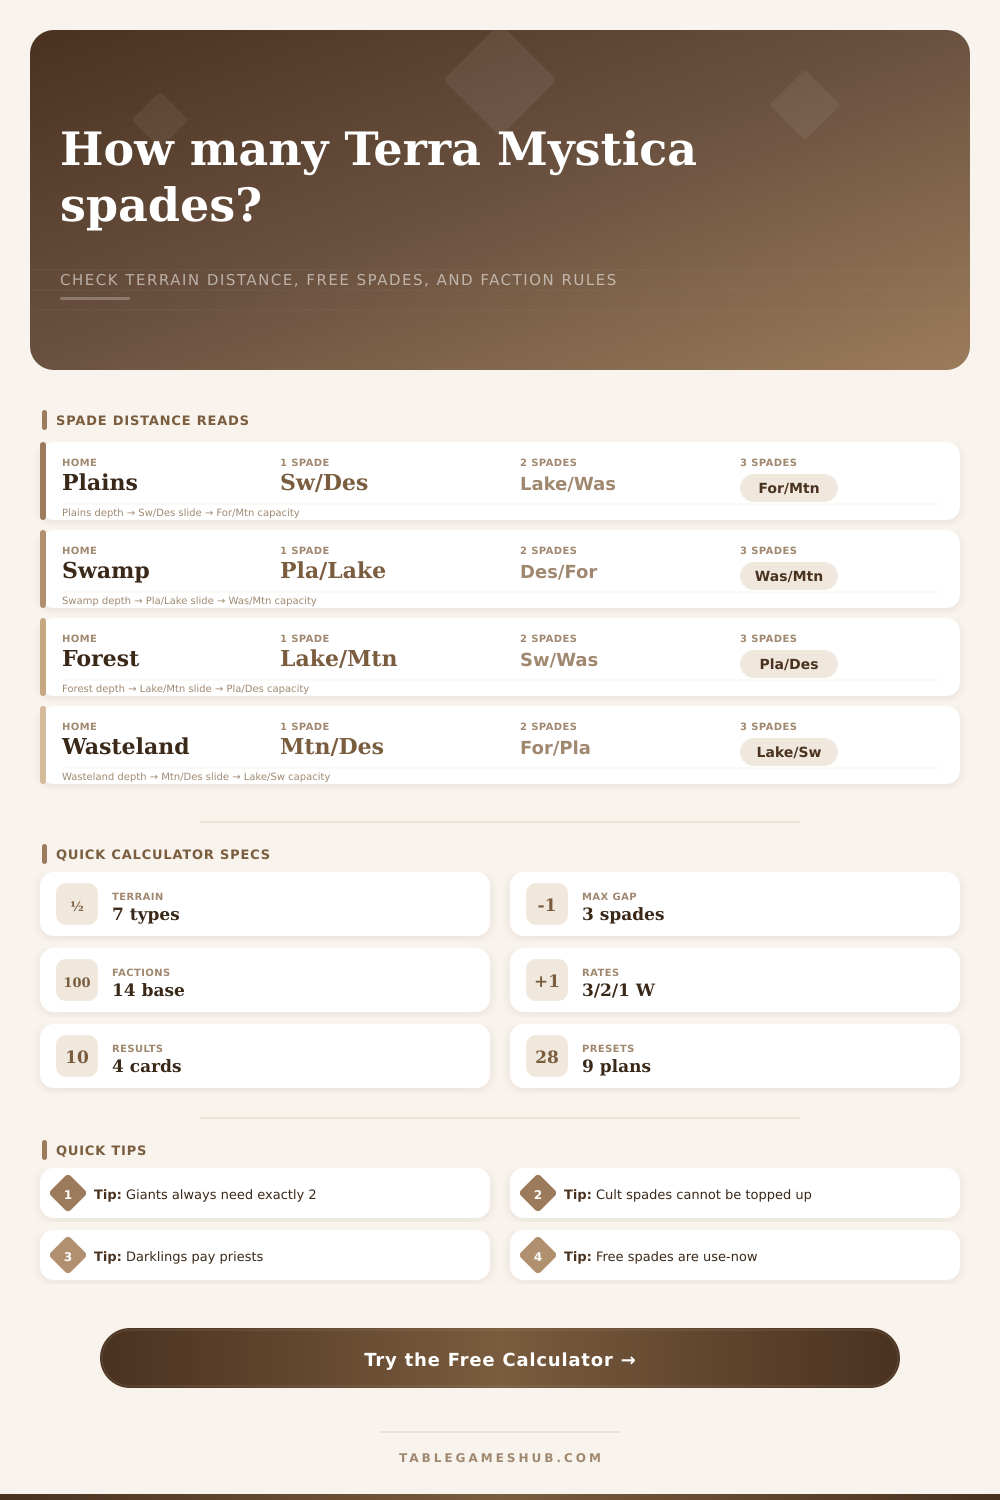
| Home terrain | Home factions | 1 spade away | 2 spades away | 3 spades away |
|---|---|---|---|---|
| Plains | Halflings, Cultists | Swamp, Desert | Lake, Wasteland | Forest, Mountain |
| Swamp | Alchemists, Darklings | Plains, Lake | Desert, Forest | Wasteland, Mountain |
| Lake | Mermaids, Swarmlings | Swamp, Forest | Plains, Mountain | Desert, Wasteland |
| Forest | Auren, Witches | Lake, Mountain | Swamp, Wasteland | Plains, Desert |
| Mountain | Dwarves, Engineers | Forest, Wasteland | Lake, Desert | Swamp, Plains |
| Wasteland | Chaos Magicians, Giants | Mountain, Desert | Forest, Plains | Lake, Swamp |
| Desert | Fakirs, Nomads | Wasteland, Plains | Mountain, Swamp | Forest, Lake |
| Faction or group | Home terrain | Spade rule | Dwelling exception |
|---|---|---|---|
| Giants | Wasteland | Exactly 2 spades to transform any non-home terrain into Wasteland. | Standard dwelling: 1 worker and 2 coins. |
| Darklings | Swamp | Pay 1 priest for each missing spade instead of workers; paid steps award 2 VP each. | Standard dwelling: 1 worker and 2 coins. |
| Halflings | Plains | Gain 1 additional VP for each spade received; Stronghold grants 3 immediate spades once. | Standard dwelling: 1 worker and 2 coins. |
| Engineers | Mountain | Normal terrain wheel distance and normal exchange track. | Dwelling costs 1 worker and 1 coin. |
| Swarmlings | Lake | Normal terrain wheel distance and normal exchange track. | Dwelling costs 2 workers and 3 coins. |
| Dwarves and Fakirs | Mountain or Desert | Normal spade cost; Tunneling or Carpet Flight changes reach, not wheel distance. | Standard dwelling unless another faction board rule applies. |
| Spade source | Free spades | Can buy missing spades? | Can build dwelling now? |
|---|---|---|---|
| Transform and Build action | 0 | Yes, at current exchange rate. | Yes, if terrain becomes home and dwelling resources are paid. |
| Power action: 1 spade | 1 | Yes, if the one spade is not enough for the chosen hex. | Yes, on the transformed home terrain. |
| Power action: 2 spades | 2 | Yes, if the two spades are not enough for the chosen hex. | Yes, on one completed home terrain only. |
| Bonus card spade action | 1 | Yes, during the action phase. | Yes, if the transformed hex is a legal build space. |
| Round cult bonus | Variable | No, because it resolves outside the action phase. | No, build must wait for a later action. |
| Halflings or Giants Stronghold | 3 or 2 | Uses the same immediate spade rules for reachable terrain spaces. | The Stronghold text allows a dwelling on exactly one completed space. |
| Terraforming level | Exchange rate | Advance action cost | Advance reward |
|---|---|---|---|
| Starting exchange space | 3 workers per spade | No advance required for most factions. | No immediate VP from starting here. |
| First improved exchange | 2 workers per spade | Usually 2 workers, 5 coins, and 1 priest. | 6 VP for lowering the exchange rate. |
| Best exchange space | 1 worker per spade | Usually 2 workers, 5 coins, and 1 priest again. | Another 6 VP for the second advance. |
| Darklings exception | 1 priest per missing spade | No worker exchange track. | 2 VP for each priest-paid transformation step. |
After you stand at table with a fresh hand of cards, you find yourself staring down a mostly-blank board: a canvas waiting for your touch. The urge is to dive right in and grab some land, but Terra Mystica isn’t a race; it’s a reward for patience. Impulsive terraforming comes back to bite you, as each worker you use to alter terrain becomes one fewer worker that could erect a dwelling or push your exchange rate forward. In a world where someone else might covet the same hex, you want to know precisely how much you can afford before committing to a given hex. That delicate balance between preparation and occupation is where the game lies.
To save yourself from having to do all this math yourself (it’s a lot of back-of-the-napkin calculations trying to keep tabs on distance traveled by each wheel and converting everything from that), the calculator above takes care of that part for you as soon as you input your terrain types and faction abilities. And it doesn’t stop at simply counting steps; it also ensures that there are enough priest/workers available to bridge gap between potential spades and the actual demand.
How to Manage Spades and Workers
Players tend to forget that buildings needs to be paid for separately from process of terraforming them… And most severely underestimate just how rapid those costs accumulate. Sure, you could convert the swamp into your desired terrain, but if you don’t have any coin for building itself, then congratulations, you’ve spent a turn making pretty scenery everyone is unable to inhabit.
The key is to know the wheel. How much it cost to move around the wheel determines how far you can go in one turn. On average, it will cost you one to three spades to travel from one type of terrain to any other. That’s why you want to organize your game to keep everything close together (e.g., place a lake adjacent to a forest for cheap). However, attempting to transform a desert straight into a swamp will set you back big time.
If you’re playing as the Giants, you’ll note that you must spend precisely two spades no matter what, that shifts things drasticly. You don’t care about proximity on the wheel; you only care about having enough free spade generated by power actions or strongholds.
Momentum is the game’s free spades currency. Power actions generates free spades without spending workers (and they do have some tight timing requirements). For example, if you take a one-spade action requiring two-step terrain change, then you’ll have to cover the gap at your exchange rate. This is where folks fall down on the job because “free” equals “fully covered,” which isn’t true here (it’s a discount). The tool will compare how much free resource you’ve got to the real amount needed so shortfall will be flagged. Also, it will flag when you can’t top up because of timing of actions (e.g., cult bonuses resolve during non-main-turn phases).
The cost of those additional payments is relative to your exchange rate. In the early game, the transformation will begin to pinch at three workers per spade. To improve that ratio, you’ll need to spend more resources up-front (two workers per spade). You will see the benefit further along the line (one worker per spade). Build some houses and improve your exchange rate, think of it as a second priority after building your initial houses. The calculator takes into account where you’re standing on the track: You’ll see the actual man-power cost, not just arbitrary spades.
Finally, faction abilities complicate things in ways as diverse as individual players. With darklings paying with priests instead of workers, they can turn an annoying chore into a scoring engine, earning VP for their efforts. Halflings get additional points based on how many spades they use; even if it looks like overkill, they’re encouraged to keep terraforming to try and increase their point total. The engineers can build dwellings at reduced cost so they can extend their worker supply further than almost anyone else. This stuff adds layers of depth to the game.
Because of this, no single way to play is the right answer, as what works best for dwarves tunneling underground won’t necessarily work best for mermaids expanding out onto the lakes. There are some actions where you can build and terraform in the same turn, but others will force you to secure the land before returning to build. That can be a costly delay if you’re short on workers or time, and someone else snatches up the hex you spent precious seconds preparing while you scrounged up coinage for the foundation.
The long-term benefits of efficient resource management have to be weighed against the instant satisfaction of expansion. Players often overlook how interactions with build permissions and spade sources impact each other. Placing a dwelling isn’t always an option from any spade source available to you. Knowing this saves you some face while discussing placement of your worker at the table, since he is currently sitting on a hex without a house. It’s laid out plainly enough on the page, the reference tables shows what can be built instantly, and what will require another step. Memorize it before setting up so you won’t waste a strong action by moving in a direction that won’t help your strategy on the board.
But that’s where the game teaches restraint. It tells you to hold off: Hold out until conditions are just right and the price is just right and the timing is just right and then make sure every spade pulls its weight. Because haste makes waste, and careful calculation makes domination. Every spade needs to earn his keep; whether he does so by scoring points of his own accord or simply making room for future growth later on down the line.
Make the wheel work for you. Understand the exchange rates. Use your faction ability to show that it comes from smart planning rather than just brute force. This is how you would of won at Terra Mystica.