Between Two Castles Calculator
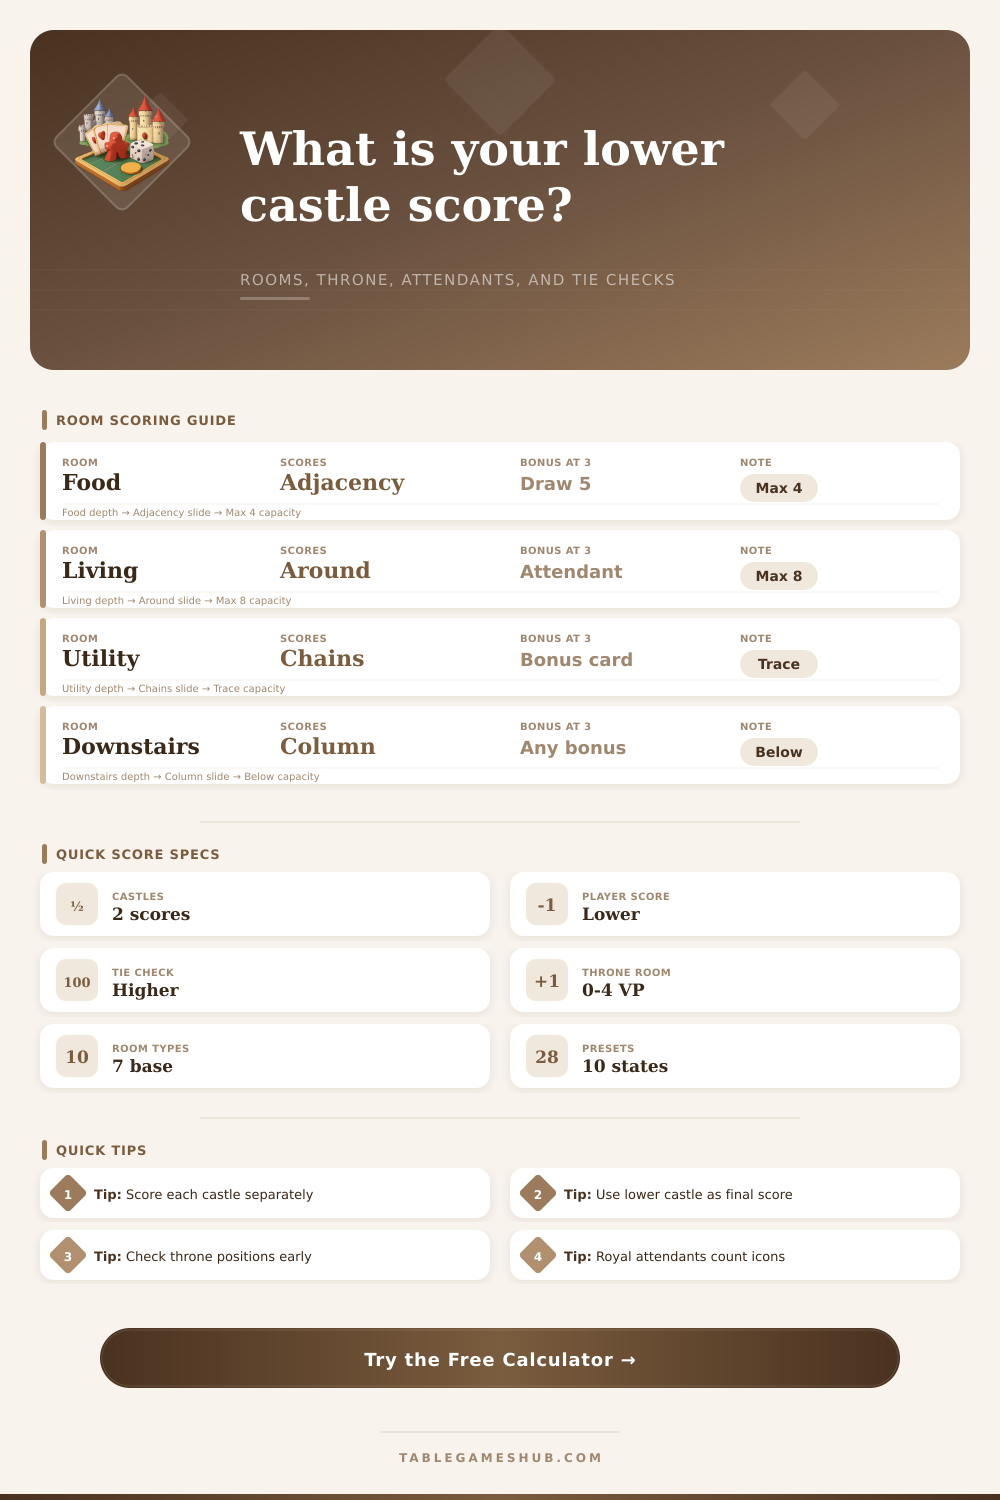
Score the castle on your left and the castle on your right, then use the lower castle as your player score with a clean tie-break and room-type audit.
Pick a scoring situation, then edit room totals, throne room matches, specialty rooms, royal attendants, bonus cards, and corrections.
Left Castle
Right Castle
Enter counts and already-calculated VP for each room family. The reference tables below show how each type usually scores.
| Room type | Left count | Left VP | Right count | Right VP | Scoring reminder |
|---|---|---|---|---|---|
| Food | Scores printed adjacency pattern, often capped at 4 per tile. | ||||
| Living | Counts matching rooms in the surrounding eight spaces. | ||||
| Utility | Counts connected chains of the named room type. | ||||
| Outdoor | Scores named rooms anywhere; do not build above outdoor tiles. | ||||
| Sleeping | Usually 4 each when the castle has the needed room variety. | ||||
| Corridor | Counts matching wall hangings in surrounding spaces. | ||||
| Downstairs | Scores named room types in its vertical column above or below. | ||||
| Activity | Expansion line for activity rooms and similar extra room types. |
Left Castle Attendants
Right Castle Attendants
Use this quick grid to sanity-check downstairs, upstairs, outdoor roof blocks, corridor flexibility, and unsupported rooms. It is an audit helper; score from the tables above.
Grid Audit
- Grid will be checked after a room is selected.
| Room type | Where it scores | Common cap | Calculator input |
|---|---|---|---|
| Food | Specific orthogonal positions shown on the tile. | Often 4 VP per room | Enter total Food VP after checking each tile pattern. |
| Living | Matching room types among the eight surrounding spaces. | Up to 8 VP per room | Enter the sum of all surrounding-match Living VP. |
| Utility | Connected chain of the named room type from the utility room. | Tile dependent | Trace each chain, then enter Utility VP. |
| Outdoor | Matching room type anywhere in the castle. | Tile dependent | Count named rooms and enter Outdoor VP. |
| Sleeping | Room variety in the castle, depending on edition and set. | Usually 1 or 4 VP | Use the printed rule from your player aid. |
| Corridor | Matching wall hanging icons in surrounding rooms. | Up to 8 checks | Count nearby icons and enter Corridor VP. |
| Downstairs | Named room types in the same vertical column. | Tile dependent | Check above and below its column, then enter VP. |
| Third room type | Bonus to resolve | Fifth room reminder | Score location |
|---|---|---|---|
| Food | Draw a small set of room tiles, choose one to place. | May add a specialty room at the fifth Food room. | New tile VP goes into its room family row. |
| Living | Add a royal attendant to the throne room. | Fifth Living can add a specialty room. | Attendant VP goes in the attendant helper. |
| Utility | Draw bonus cards and keep the allowed card. | Fifth Utility can add a specialty room. | Bonus card VP goes in Bonus card VP. |
| Outdoor | Place a fountain specialty room. | Fifth Outdoor can add another specialty room. | Enter printed fountain VP in Specialty room VP. |
| Sleeping | Place a tower specialty room. | Fifth Sleeping can add another specialty room. | Enter tower VP after counting rooms below it. |
| Corridor | Place a grand foyer specialty room. | Fifth Corridor can add another specialty room. | Enter grand foyer VP after surrounding check. |
| Downstairs | Choose any one of the third-room bonuses. | Fifth Downstairs can add a specialty room. | Record the chosen effect in its relevant row. |
| Check | Rule of thumb | Why it matters | Calculator area |
|---|---|---|---|
| Throne room | Score the two requested room positions around it. | Each fulfilled position is a direct VP bump. | Throne room positions matched. |
| Downstairs | Place downstairs rooms below the throne room level. | Wrong level can distort column scoring. | Grid audit plus downstairs count. |
| Corridors | Corridors may help above or below ground depending on side. | They bridge scoring and placement plans. | Corridors above and below fields. |
| Outdoor roof | Do not place any room above an outdoor tile. | Outdoor rooms end their vertical stack. | Grid audit roof-block warning. |
| Player score | Compare your two castle totals and keep the lower. | One weak castle defines your final score. | Player Score result card. |
| Tie-break | Use the higher castle when tied on lower score. | A balanced pair is strong, but tie totals still matter. | Tie-Break Castle result card. |
Lower castle first: Check which side is behind before chasing flashy bonuses. A five-point gain in the lower castle is usually worth more than a bigger gain in the already-safe castle.
Separate printed VP from triggers: Score each room tile, then add throne room, specialty room, attendant, and bonus card points so nothing is counted twice.
Column rooms need a second look: Downstairs and tower-style specialty rooms are easy to miscount because one vertical column can cross several floors.
Use the grid for placement doubts: It catches the most common audit issues: outdoor roofs, unsupported upstairs rooms, and downstairs rooms above ground.
That last round of *Between Two Castles*, though, gets in there and makes you panic in a special way. It’s forty-five minutes spent carefully arranging rooms and lining up royal attendants just so. And then it’s time to score. And you’re doing math and it doesn’t feel like math, it feels like a trap. Which castle are you looking at? Your left or your right? Is that the castle that counts toward your final score? Panic sets in.
The core mechanic of the game is that your lower-scoring castle determine your player score. One grand castle are built, while the other is allowed to rot. Disappointment awaits. Most people attempt to build out their superior structure as much as possible. However, by the time they notice, it is their poor cousin that has pulled them down into mid teens.
How to Score in Between Two Castles
Plug in your bonus values and your number of rooms into the calculator up top and it’ll take care of math for you. No more tracing vertical columns or adjacency chains out manually. But do know what each element contributes so that you input your numbers correctly.
The biggest mistake people make is with their living room. Those rooms are scored by how many matching room types is in the eight spaces around them. Sounds easy enough until you notice that one misaligned hallway can fracture a group of matches. That’s when your possible score goes from a dozen points down to four. So, think beyond just what tile you’re on and try to view entire grid at once. Does the living room look like it could be worth more? Is it surrounded by utility or food rooms? It won’t hit its full value if so. See, that’s where folks go wrong: counting only the rooms themselves without paying attention to how they relate to each other.
Food rooms take that idea a step further. There’s a clear requirement for certain kinds of positions right next to them, printed on the tile itself. If you’re in a food room and the position due north and south of you has something else blocking it or nothing at all, then you get 0 points for that food room. However, if both north and south do have food tiles, then you get 3 points for that food room. So it’s rigid where you can put things. It doesn’t matter if you throw food tiles around willy-nilly on the board. You need to follow patterns when you find one and build out from there. Every tile is like a key that only unlocks certain doors.
Adding the third-room bonus on top of that just adds complexity. Once you have your third room of some sort, you also get to do some kind of special thing (like draw more tiles, or place a fountain). Forgetting about that special thing in grand total is easy. You may have laid down the rooms, but did you remember to factor in the specialty room points for having done so? Did you remember to count the VP from the bonus card that triggered when you placed the room? All that stuff will make your grand total look worse then it should.
That’s complicated by the verticality, which is hidden from view in flat board games. Rooms with stuff above/below in the same column gets scored vertically. So you need to project the 3D building onto the 2D grid in your head. For example, a tower can be easy to over-count if you don’t double-check the lower rooms stacked underneath. A tower whose bottom floor isn’t aligned with the corridor will throw off your count (though it’s hard to tell unless you’re careful).
And then there are corridors, which are crazy wildcards. On one hand, they let you position things freely. On the other, they is likely to break needed connections between utility rooms. These rooms score points by chaining together rooms of any given type. One broken corridor can cut your points for that room in half. That means you have to balance short term gain (“I need a corridor here”) against long term pain (“but I’ll screw up my chain scoring”).
Finally, there’s another pool of points that gets overlooked till late: the points from the royal attendants themselves. There are four different kinds of attendants, sword, mirror, torch, painting. And they each match a particular icon (shown below). They’ll give you a single point per icon match in adjacent rooms. It’s a localized bonus, so if you scatter your throne around, your attendants will starve. You want to focus on two or maybe three different types of icon to create synergy between them. This gives you more attendant points, and the corridors also checks for matching wall hangings. The higher your attendant point count, the better your corridor score! Don’t try to have it all, just enough of what you need to prop up the rest.
In the end though, it’s less about building a perfect castle and more about mitigating risk; you can’t let one side fall behind by a couple of points because that’ll be the difference at the end of the match. If both are in reach of one another, check back early, use the tool to check your numbers and ensure neither gets left far behind the other; this is how you’ll finish high. Specialization is punished in this game; balance is rewarded. So keep an eye on both sides: the strong one, certainly, but also the weak one. It isn’t the highest castle that wins. It’s the most consistantly built pair.