Twilight Imperium Influence Calculator
Plan ready planet influence across Leadership command tokens, Status Phase objectives, Imperial scoring windows, and Agenda Phase vote pressure.
Use this for Twilight Imperium Fourth Edition influence planning when a round asks you to choose between command tokens now, points in the Status Phase, and votes after Mecatol opens the council.
Influence plan results
| Planet or system | Resource / influence | Trait or status | Calculator use |
|---|---|---|---|
| Mecatol Rex | 1 / 6 | Center planet | Six votes, six influence toward Leadership, and Imperial Mecatol point pressure. |
| Meer | 0 / 4 | Hazardous | Excellent pure influence bank for Sway the Council or a large vote threat. |
| Lirta IV | 2 / 3 | Hazardous | Flexible planet that can buy a command token by itself when ready. |
| Centauri | 1 / 3 | Cultural | Clean three-influence planet for one Leadership command token. |
| Torkan | 0 / 3 | Cultural | Pure vote and token planet with no resource opportunity cost. |
| Rarron | 0 / 3 | Cultural | Agenda and Leadership fuel that preserves production planets elsewhere. |
| Mehar Xull | 1 / 3 | Hazardous tech skip | Three influence plus red technology skip tension in the same planet. |
| Mallice | 0 / 3 | Legendary frontier planet | High agenda value and command-token value when the frontier opens. |
| Objective | Public stage | Spend requirement | Planning consequence |
|---|---|---|---|
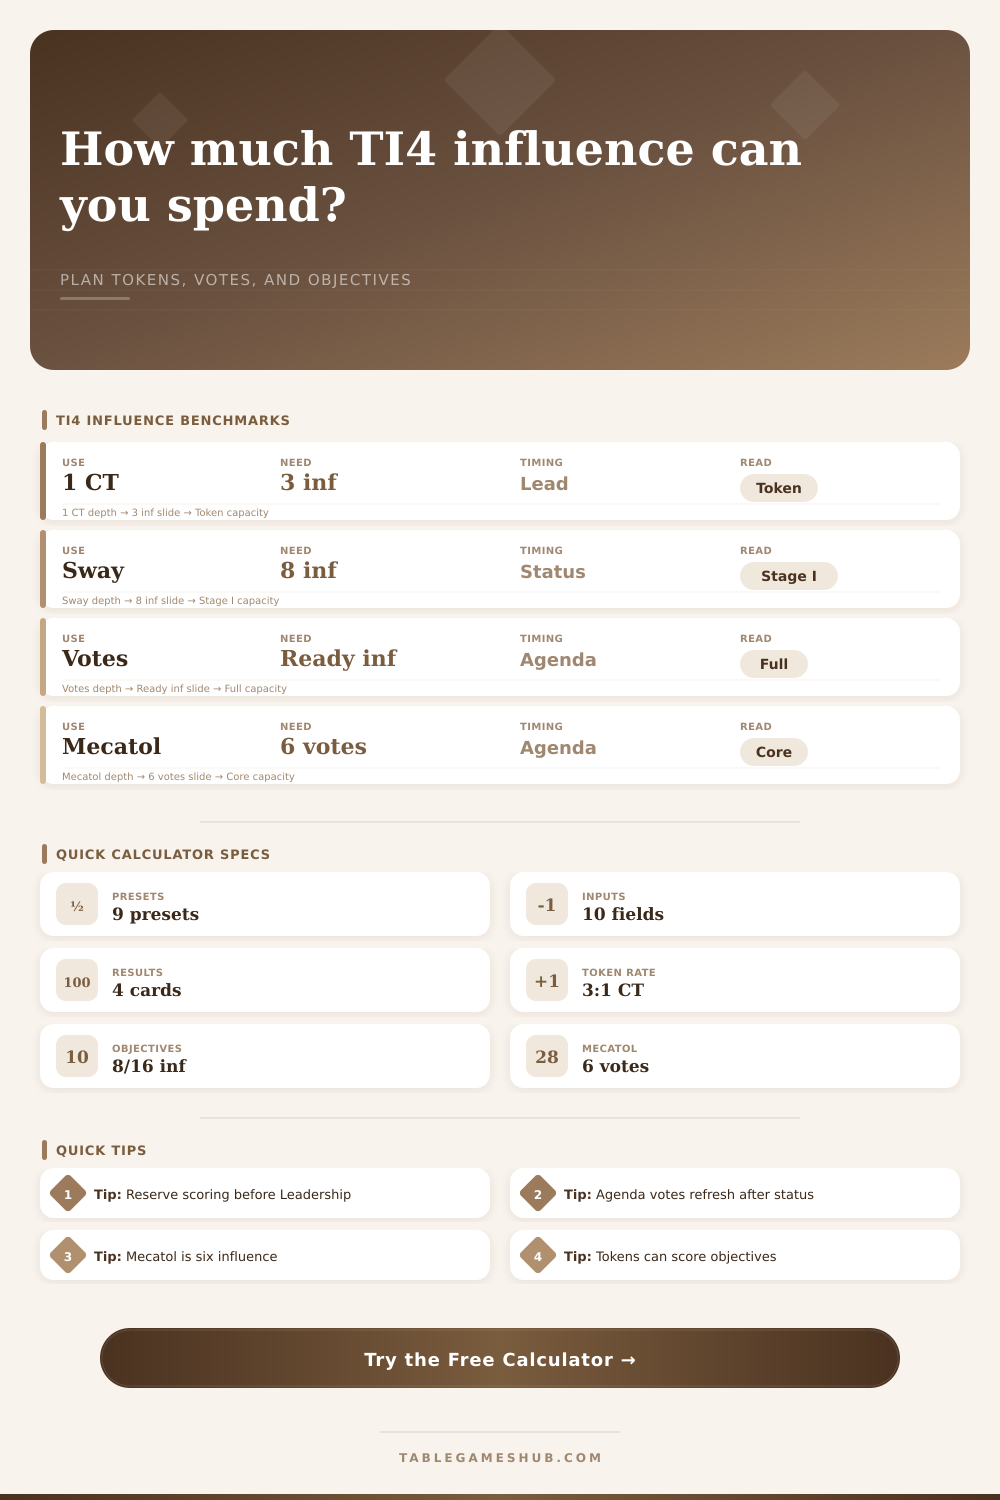
| Sway the Council | Stage I | Spend 8 influence | Do not exhaust that eight influence for Leadership before Status scoring. |
| Manipulate Galactic Law | Stage II | Spend 16 influence | Usually needs Mecatol, several three-influence planets, or a round of careful banking. |
| Amass Wealth | Stage I, Prophecy of Kings | Spend 3 influence, 3 resources, and 3 trade goods | Only three influence is reserved here, but it competes with one command token. |
| Lead From the Front | Stage I | Spend 3 command tokens | At Leadership rate, three tokens represent up to nine influence of opportunity cost. |
| Galvanize the People | Stage II | Spend 6 command tokens | Six tokens can require a full Leadership primary plus major influence spending. |
| Timing item | Real rule math | Best input field | What the calculator protects |
|---|---|---|---|
| Leadership primary | Gain 3 command tokens, then buy 1 per 3 influence | Leadership access | Shows free primary tokens separately from purchased command tokens. |
| Leadership secondary | Buy 1 command token per 3 influence spent | Leadership access | Prevents assuming the secondary grants the three primary tokens. |
| Status Phase | Score public objectives before cards ready, then gain 2 command tokens | Status token gain | Keeps scoring influence available before forecasting next-round tokens. |
| Imperial | Score a public objective; gain 1 victory point if controlling Mecatol Rex | Mecatol and Imperial status | Separates Mecatol point value from ordinary influence spending. |
| Agenda votes | Exhaust ready planets to cast votes equal to their influence | Agenda votes to hold | Measures vote floor for one or two agendas after timing adjustments. |
| Plan target | Influence needed | Command token equivalent | Agenda value if saved |
|---|---|---|---|
| One extra activation | 3 influence | 1 tactic token | Three votes if not spent before agenda. |
| Two key secondaries | 6 influence | 2 strategy tokens | Six votes, or enough to swing many low-vote agendas. |
| Sway the Council reserve | 8 influence | 2 tokens plus 2 leftover influence | Eight votes after refresh if the agenda follows Status. |
| Mecatol plus one 3-influence planet | 9 influence | 3 command tokens | Nine votes, often enough to command a table deal. |
| Manipulate Galactic Law reserve | 16 influence | 5 tokens plus 1 leftover influence | Sixteen votes if the planets refresh before agenda. |
Let’s say: You’re sitting there at the table with a pile of planets already in hand, and you really want some command tokens. That means you’re facing a tough choice between performing the Leadership action and scoring Sway the Council. So you grab for your dice and calculate… wait. Spending those high-influence worlds here gets me my war activations. But it costs me the votes I’ll want to control the game next round during Agenda Phase.
Influence is the primary issue in Twilight Imperium fourth edition: It serves as both ammo and money. And the calculator solves this by forcing you to think about these timing windows that your brain may not spot on its own.
Why Influence Matters in Twilight Imperium
Players is fixated on “how many planets do I have?” They count them up, consider raw power in general terms, and look around the board. That’s wrong: Influence isn’t static. Once spent, it dissapears quickly. Spending influence on Leadership converts potential votes to actual, physical tokens you can deploy onto the board. However, these planets won’t be able to vote for agendas again until after the Status Phase when their influence finally replenishes itself.
Exhausted influence is displayed different than ready-to-spend influence. What can you spend now? What should of you save for politics tomorrow? The tool answers these questions and they change how you plan your turn.
Even the act of using leadership feels different. You begin with three free tokens as the first player. Plus, you receive a token for every three influence you spend. Sounds like a steal. Spend three less money in another location and you get a token, right? That’s true, except you’re paying with something most people don’t consider: Each three influence spent here mean three votes you won’t have when it’s time to move on to the Agenda Phase. And that could be your undoing if you’re up against some aggressive neighbors. Sure, you might win a retreat this round but lose a vote on a treaty that reduces strength of your fleet next round. By showing you how many votes you’ll retain after purchasing tokens, the calculator makes you consider if your short-term gains are worth your long-term losses.
The secret ingredient that foils most influence plans is timing. The planets recharge after the Status Phase but before the Agenda Phase. This causes many players to neglect this planet refresh time. Can you spend your influence on Leadership during the Action Phase? No problem, just don’t vote yet. Are you saving your influence for scoring objectives (such as Manipulate Galactic Law)? Then don’t touch that money until end of the round! If you want to score an objective, you can’t spend that money on tokens. To avoid using reserved funds by mistake, the calculator include fields for objective reserves. It keeps your spending habits separate from your scoring plans.
Finally, Mecatol Rex bucks the usual trend of influence accumulation, so I want to call that out specifically. Six votes from controlling central system is a massive edge on any agenda. Without counting its votes, Mecatol will only give you zero influence plus one resource. This makes you economically weak unless you have some production planet, but it makes you politically strong if you control Mecatol. Because Mecatol is so unusual, this tool allows you to input Mecatol control separately so it does not distort your Leadership spending calculations. This means Mecatol doesn’t screw with your Leadership spend calculations. It views Mecatol like a political asset instead of an economic one which is naturaly how Mecatol functions in practice.
Each of the tool’s presets reflects typical strategy types. Maybe you hope to pick up some fleet tokens following a tough fight, or want to save your votes on a particular result from Council. Each preset alters the inputs accordingly. It demonstrates how altering your priorities affects how you’ll spend resources. There is no single “right” number. Rather, it’s all about getting an idea of what’s feasible and what isn’t.
Before long, you realize that wanting to do everything results in doing nothing well. In the end, I think most of planning influence is just being disciplined. Deciding where to flex and where to hold back is key. Sometimes, saving up some of that influence are more powerful than spending everything at once. But the tool doesn’t make that decision for you; it reveals what will happen if you do or don’t spend it. And then you can tweak it ahead of time and go in.”
With knowledge of how influence flows through the system, the game no longer feels so haphazard. Rather, it becomes a series of decisions that you can influence. You not only get control over your planets, but also the pace at which you play.