Knife Throwing Distance Calculator
Set a practical throwing line from knife length, stance offset, target center height, spin style distance bands, and a clear safe lane buffer.
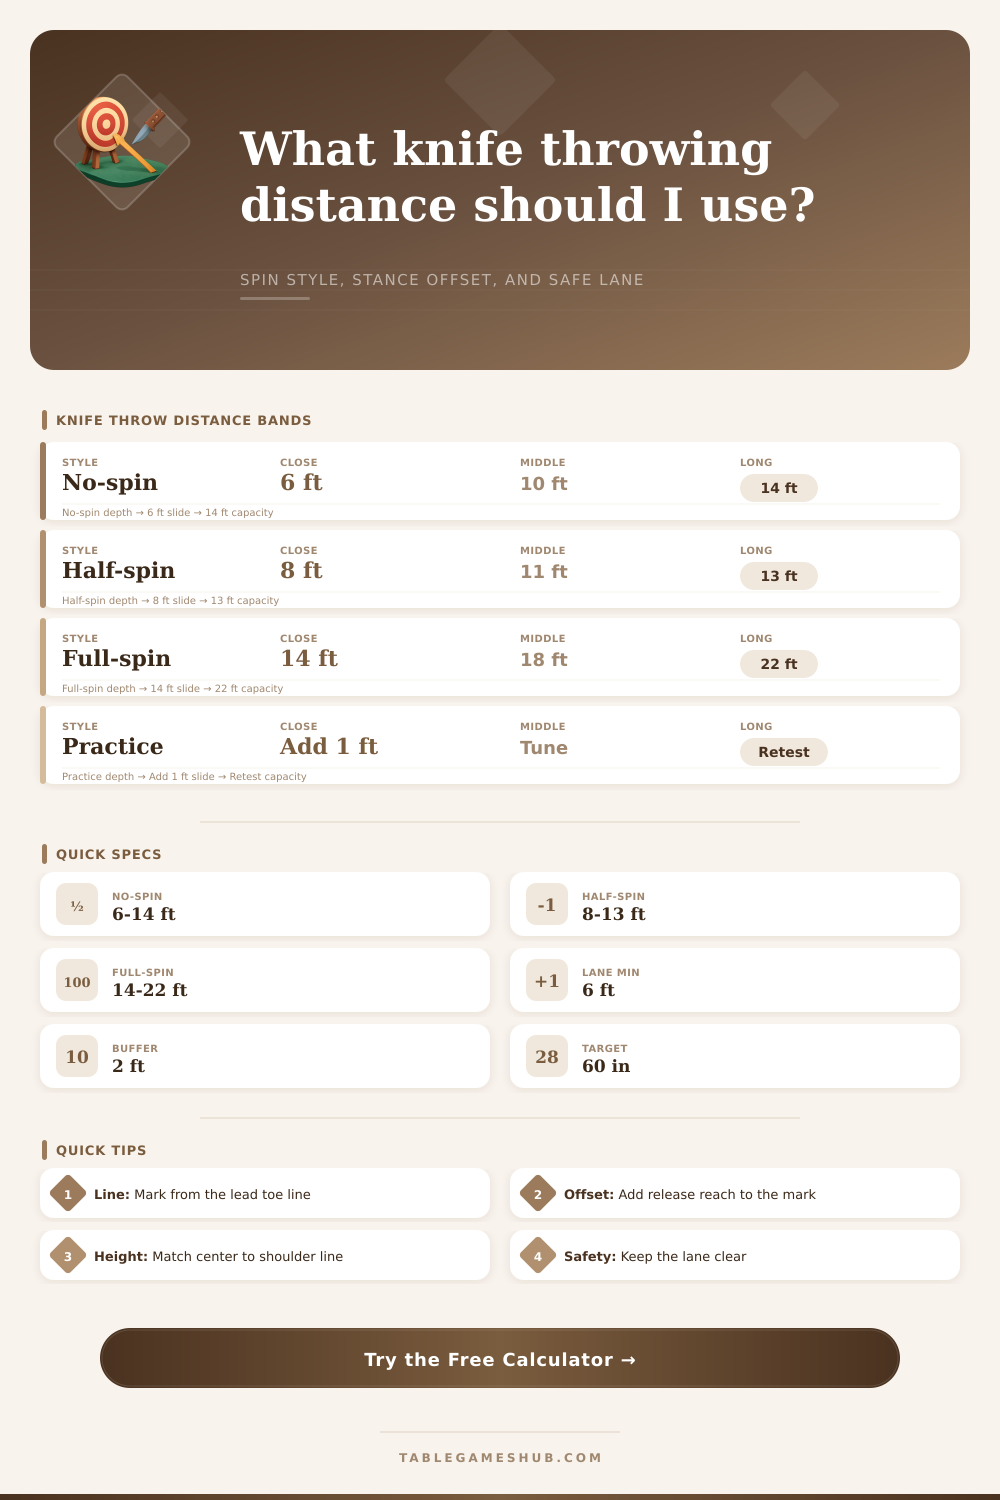
This planning tool is for controlled target throwing lanes. It estimates where to mark the toe line, how the distance sits inside no-spin, half-spin, and full-spin bands, and how much side clearance the lane should reserve.
| Throw style | Common toe-line band | Best use | Distance adjustment cue |
|---|---|---|---|
| No-spin | 6 to 14 ft | Close control lanes and straight-release drills | Move 6 to 12 inches at a time |
| Half-spin | 8 to 13 ft | Tip-forward half-turn practice | Tune in 6 inch steps near the center |
| Full-spin | 14 to 22 ft | One-rotation setups with longer sight line | Use 12 inch steps, then fine tune |
| Mixed practice | 10 to 18 ft | Comparing release changes without moving targets | Mark separate toe lines for each style |
| Knife length | Distance feel | Useful band note | Setup reminder |
|---|---|---|---|
| 8 to 10 in | Short and quick | Often prefers closer tuning marks | Use tighter distance steps |
| 10 to 12 in | Balanced practice size | Works well across half-spin and no-spin bands | Start near the middle of the selected band |
| 12 to 14 in | Longer sight picture | May feel calmer at longer marks | Check release distance after stance offset |
| 14 in and up | Specialty long knife | Needs more deliberate lane planning | Use a wider buffer and retest slowly |
| Target center | Typical range | Use case | Height cue |
|---|---|---|---|
| 48 to 54 in | Lower center | Youth, seated-adapted, or low board practice | Keep release path level and controlled |
| 55 to 62 in | Common center | Most standing target lanes | Match shoulder line within a few inches |
| 63 to 70 in | High center | Tall throwers or elevated boards | Confirm the knife does not climb late |
| Adjustable | Custom center | Shared lanes with different throwers | Record height with each distance mark |
| Lane element | Minimum planning value | Preferred value | Why it matters |
|---|---|---|---|
| Side buffer each side | 1.5 ft | 2 ft or more | Keeps observers and gear out of the throw path |
| Clear lane width | 6 ft | 8 ft or more | Leaves room for stance and retrieval movement |
| Behind-line space | 3 ft | 4 ft or more | Gives the thrower room to reset safely |
| Target backstop width | Target plus 2 ft | Target plus 4 ft | Covers reasonable misses around the scoring area |
To effective throw a knife at a target, an understanding of distance is require. Distance is a variable in determine how the knife will behave when thrown. The distance between the thrower and the target will affect the spin that is used, where the release hand will end, and whether the knife will travel point first or handle first.
If the distance are chosen incorrectly, the physics of the knife’s flight will not work in conjunction with the adjustments that is made to the knife’s flight. The calculator use specific inputs to determine the math that will be performed for the calculator’s end user. Four different measurement must be provided to the calculator.
How to Find the Right Distance to Throw a Knife
The first is the distance from the target face to the lead toe line. The thrower will place the release hand ahead of the toe line by the length of the forward step. The stance offset must be subtracted from the distance from the target to the toe line to find the actual distance that the knife will travel.
This actual distance will be used to calculate the fit percentage for the selected spin styles. The distance that a knife travels will differ with the different spin style that are used. No-spin throws will require the knife to travel in a straight line.
The space for no-spin throws will be narrow if the distance is too great, and the tip of the knife will fall to the ground. Half-spin throws will have the knife perform one half rotation during the flight of the knife. Full-spin throws will have the knife perform one complete rotation during its flight.
Full-spin throws will require more distance than half-spin throws. The calculator will provide the user with the proper distance for each spin style. The two-foot side buffer that is provided on each side of the throwing lane will account for the number of knives that must be provided to account for the observers of the knife throws.
The height of the target can impact the flight of the knife. If the center of the target is higher than the height of the release point of the knife, the knife will have to travel upward to the target before it can drop to the target. The angle of release of the knife may alter a half-spin throw to a full-spin throw.
The calculator will provide information regarding the height of the target to enable the user to decide whether the target should be lowered, the stance should be raised, or the distance should be adjusted. The length and weight of the knife will affect the way the knife behave. For example, a twelve-inch knife that weighs ten ounces may be balanced for half-spin throws.
Shorter knives will require the user to stand at a closer distance from the target line because shorter knives will allow the knife tip to drop to the ground too quick. Longer knives will require more distance from the user to the target because the longer knife will require more time to stabilize its extra weight. While the calculator will provide adjustments for knife length, the user will need to experiment with the knife to determine the proper distance.
The user can throw the knife, observe the way that the knife spins, and adjust the toe line until the knife consistently stick into the target. Distance bands are not universal, so the user must refer to the included tables. Tables that display the distance required for youth knife throws will have different distance than those required for competitive knife throws.
While youth knife throws will use targets that are lower and require shorter knives, competition knife throws will use taller targets and heavier blade. The lane-element table will indicate the minimum distance for the side buffers, the behind-line space, and the width of the backstop. These are planning value for the users to ensure that the knife’s path to the target does not cross the flight line of knives thrown at the target.
Many people makes mistakes when throwing knives. One of the most common is only setting the toe line for the distance and never adjusting it according to the spin style that is to be used. Each spin style require different distances for the release hand of the thrower.
The stance offset must also be accounted for. If the distance from the target is only measured to the toe line, the distance that is used for throwing the knife will be forgotten to account for the stance offset. If this value is forgotten, the knife will under-rotate.
Outdoor knife lanes can present different conditions to the knife throwers. The wind can impact the flight of the knife, and the ground may not be even within the lane. While the calculator cannot account for the wind, the user can use the minimum width of the lane that is calculated by the calculator.
Indoor lanes might not have the same depth as outdoor lanes. If the distance that is indicated by the calculator is too great for the depth of the indoor lane, then the user will be required to use a different spin style for the knife throw. The tolerance that is allowed for the fit of the distance will have an impact on the user.
A tight tolerance will be used in competitive knife throws to ensure that small adjustments will be accounted for. A loose tolerance will be used while practicing knife throws. If the percentage of the fit of the knife to the distance is appropriate, the user can avoid knife throws that are too tight or too loose.
The side-buffer is the number of inches of space that will be required on each side of the target. The lane-width will indicate how much space will be required for the user to move between the knife throws. The breakdown at the bottom of the calculator will indicate the calculations that determine the minimum width of the lane.
Although the calculator will make it easier for the user to determine the proper distance for the knives, the user will need to stand at the line and actualy throw the knives. The calculator cannot replace the feel of the knife throw. By standing at the distance that was calculated by the calculator, the user can observe the knife land and how well it stick into the target.
If the knife consistently stick to the target when the user stands at the calculated distance, then both the calculator and the users muscle memory are in agreement.