Boonlake Score Calculator
Total current VP, region scoring, settlement presence, cattle adjacency, scoring markers, lever actions, played cards, boats, buildings, and final tier bonuses.
🧭Score Sheet Presets
📝Table State and Current Score
Use current VP for everything already recorded on the score track. The calculator then adds optional region scoring, interim marker checks, income VP, cattle scoring, and end-game Boonlake scoring.
🏞Regions, Settlements, and Region Scoring
🐄Cattle, Buildings, and Income VP
🎯Scoring Markers and Interim Checks
🎴Cards, Levers, and Final Scoring
🛠Removed Pieces, Boats, and End Tiers
🧮Live Boonlake Audit Grid
📚Boonlake Reference Tables
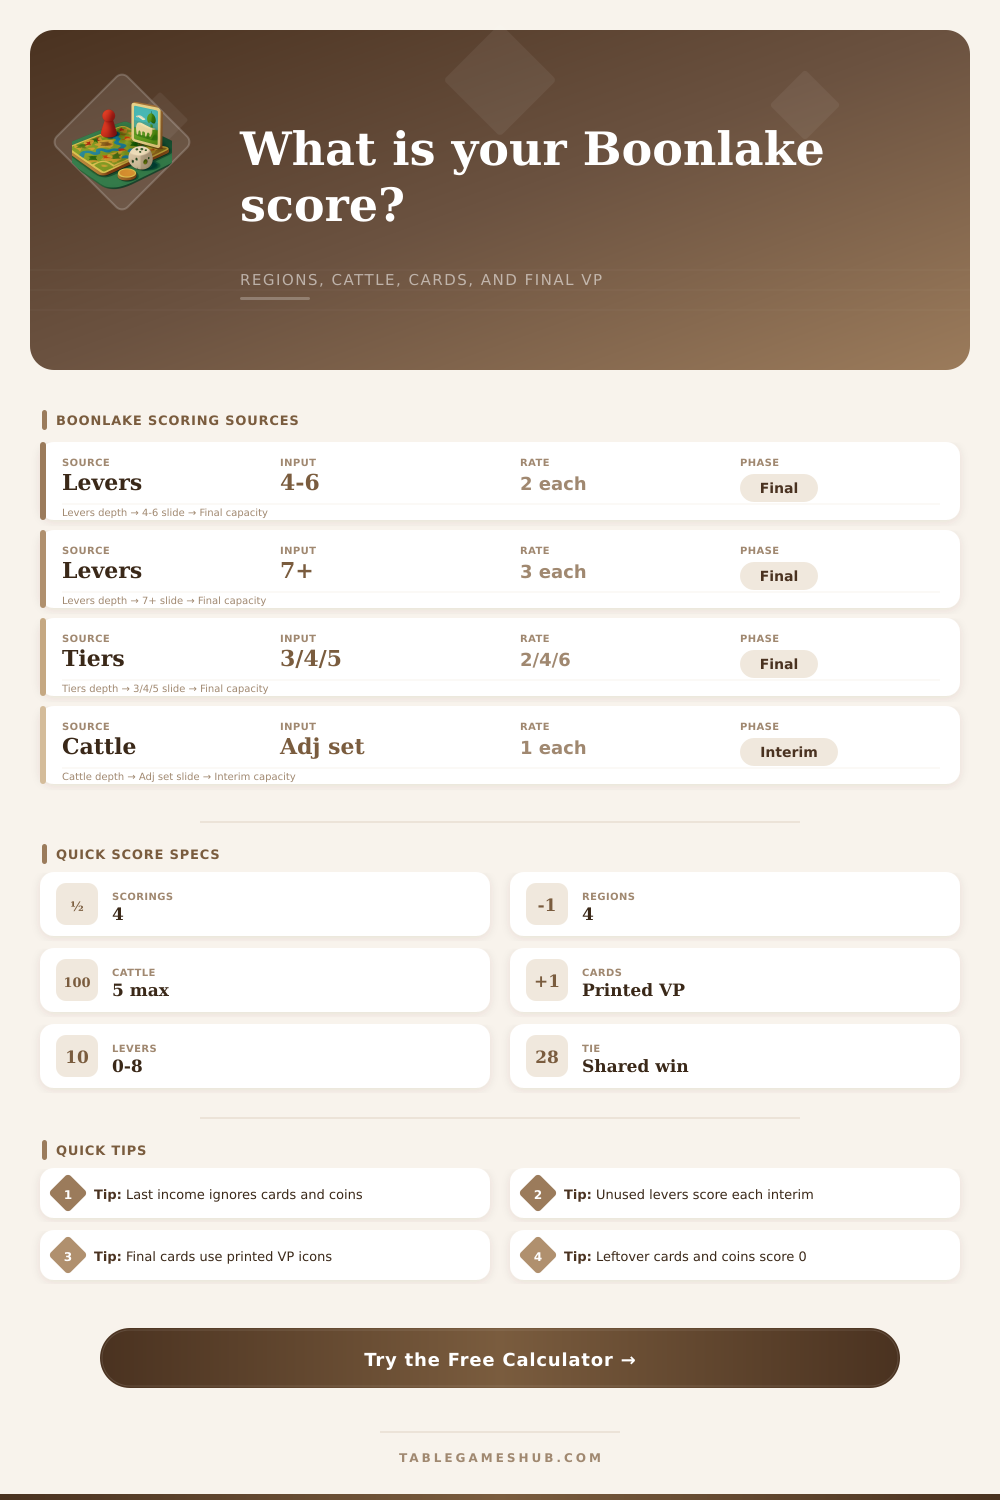
| Final source | Rule rate | Calculator field | Scores when |
|---|---|---|---|
| Levers | 4-6: 2 each | Levers on board | Final |
| Levers | 7+: 3 each | Levers on board | Final |
| Played cards | Printed VP | 4 card VP fields | Final |
| Tier recesses | 2 / 4 / 6 | Third to fifth tier | Final |
| Interim source | Rule rate | Calculator field | Note |
|---|---|---|---|
| Scoring marker | +/- 1 to 4 | Current scoring | Can double |
| Unused levers | 1 each | Unused levers | Before reset |
| Cattle scoring | 1 per link | Adjacent links | Per cattle |
| Last income | VP only | Income VP | No cards/coins |
| Region | Presence count | If covered | If not covered |
|---|---|---|---|
| Boonlake | All pieces | Label reward | 1 coin each |
| Unknown | All pieces | Label reward | 1 coin each |
| New Hope | All pieces | Label reward | 1 coin each |
| Southern | All pieces | Label reward | 1 coin each |
| Board audit | Useful range | Why it matters | Output |
|---|---|---|---|
| Houses | 0 to 12 | Upgrade path | Grid |
| Settlements | 0 to 8 | Cattle VP | Links |
| Small boats | 0 to 4 | Resource plan | Audit |
| Leftovers | Any | 0 final VP | Warning |
💡Score Audit Tips
By the time last round at Boonlake comes around, strategy gives way to mathematics. You have placed your last inhabitant. You’ve got the majority in the region. You just need to get points. And that’s where careful counting come into play. There are so many tiny settlements to keep track of, and you can’t forget that the loose change doesn’t add up to nothing. That’s where the score calculator comes in handy. The program does all the math for you, so you can concentrate on getting points. So you don’t have to second-guess your math.
Presence, placement Presence is how much you have, and placement matter, specifically, having them in the right place to earn region rewards. For that reason, the calculator lets you enter what regions you are present in, and confirms if you has enough presences in any one to score a region reward. Because some experienced players mistakenly think all regions dole out victory points straight away, it’s important to distinguish interim income vs. Points, which is where the tool can help clarify.
How to Count Your Points Easily
Another way to get points is cows. They give points depending on how many settlements they touch. Each cow scores based off how many settlements it touches. It encourages clustering over spread out expansion. Just put in your count of cattle and adjacent ones into the tool and it’ll show you how much they all add up. People tend to underestimate totals when counting by hand since they miss a tile from two turns ago or forget about a connection somewhere. With the calculator, every single link will be counted properly and no points will be left behind.
The addition of levers complicates things further. The score for installing four to six is different then the score for seven or more. You get a choice there of small improvement now versus greater later. Once you enter your number of lever, the tool will take that into account and divide those scores accordingly. Unused levers during in-between scores get entered too and will bump up your points prior to resetting. Knowing what each is worth tell you if you followed your plan well.
The thing about cards: they add up consistently over the course of the game. Their final value is just based on summing up printed icons. It’s just straight-up addition: add all the sun, night, and day icons on all your cards plus any bonuses you got from them. That’s it, simple math but simple enough to miss in the heat of battle. So the calculator breaks out card points separately from your own board position, allowing you to look at your hand relative to your space and figure out if you’re winning by board control or deck management.
The scoring markers bring with them another two-sided outcome that in many ways change the game. Points are added if you meet the condition on your scoring tile. They’re taken away if you fail. If you have a doubled setup tile, this effect is magnified. Then it doubles again. With this tool, you can keep track of what you did score (and didn’t) without forgetting any bonuses or penalties. That makes all the difference when scores are close. And the marker system requires thinking about being consistent, not just raw output.
Lastly, there are the Tiers, those long-game investments into your board infrastructure. Getting value from them is all about emptying out the spaces on higher tiers. These add up to some pretty substantial victory points at the end. The calculator also takes into account any additional final bonuses (and sums it all together) to spit out an expected total. That’s your verdict on your game plan. Did my sacrifices paid off? Where did I slip up? With the rule application and addition taken care of by the calculator, you can now review your game story without getting lost in the math. You could of walk away knowing why you won or lost.